There are several different options for settings when using our Google Classroom integration. See the different options you have below.
Lock Rostering
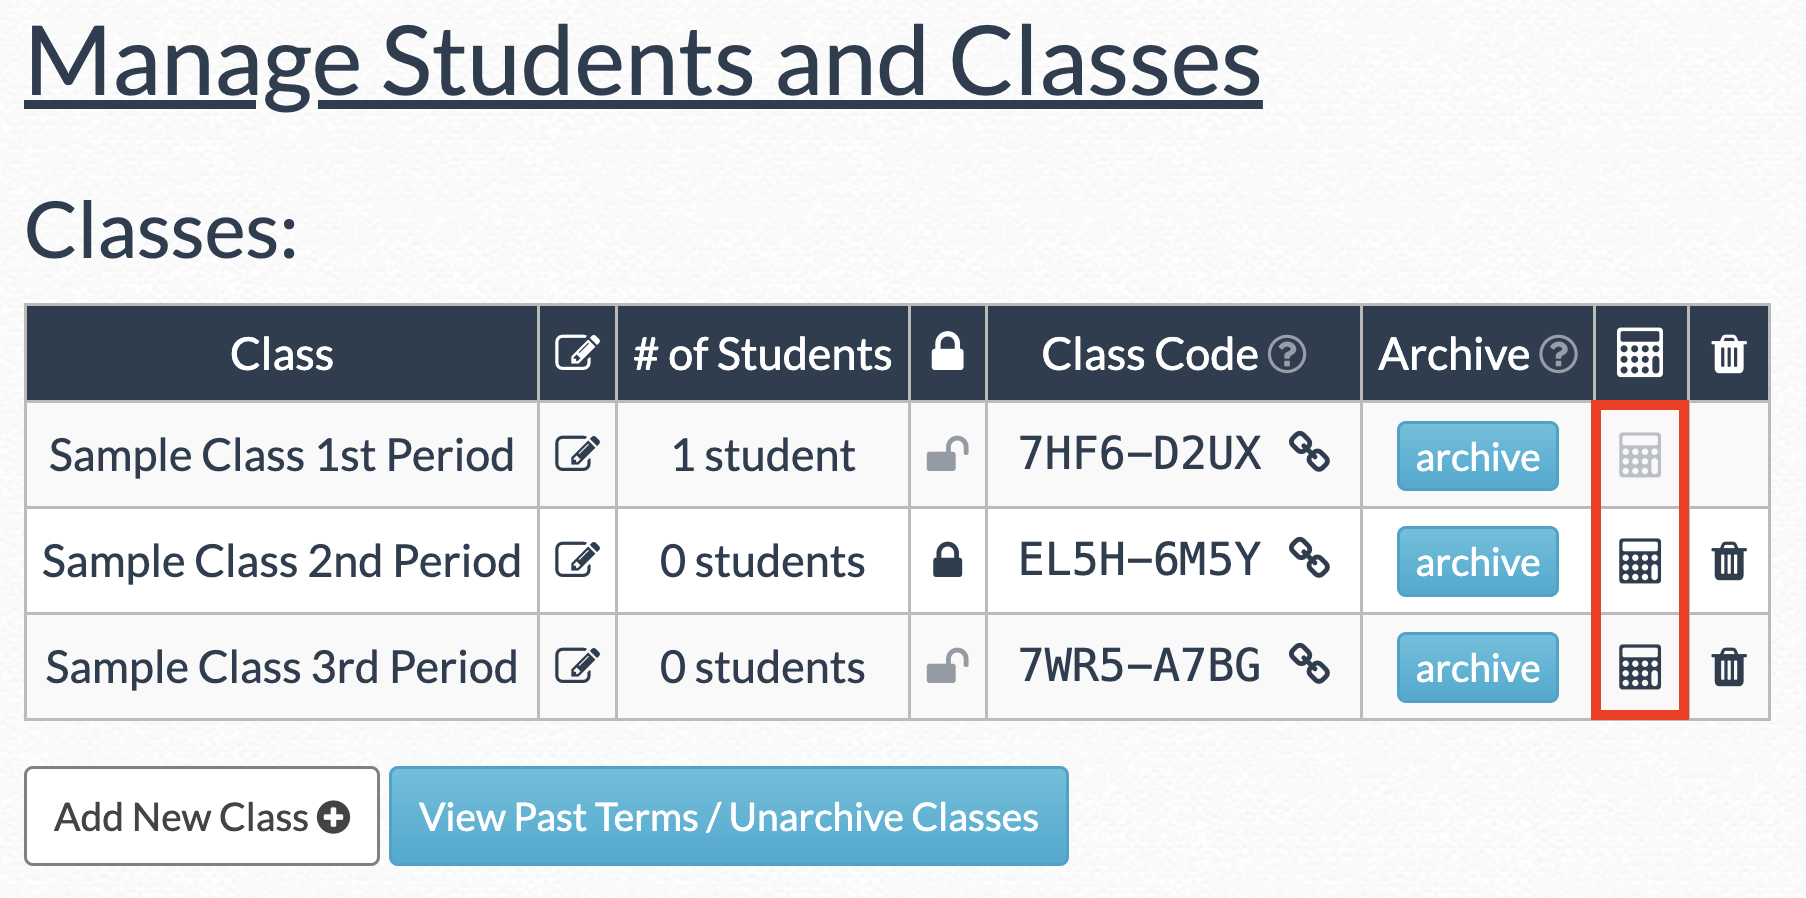
NAVIGATE: TOOLS → MANAGE STUDENTS AND CLASSES
When using our Google Classroom integration, you can add or remove students from your Google Classroom roster and then re-sync your rosters to update. Due to the integration, you are not able to manually lock rostering and you may disregard this setting.
Archiving a class saves all data and assignments into a past term. The class will no longer be visible in your current view. Click “archive” next to a class name to archive that class.
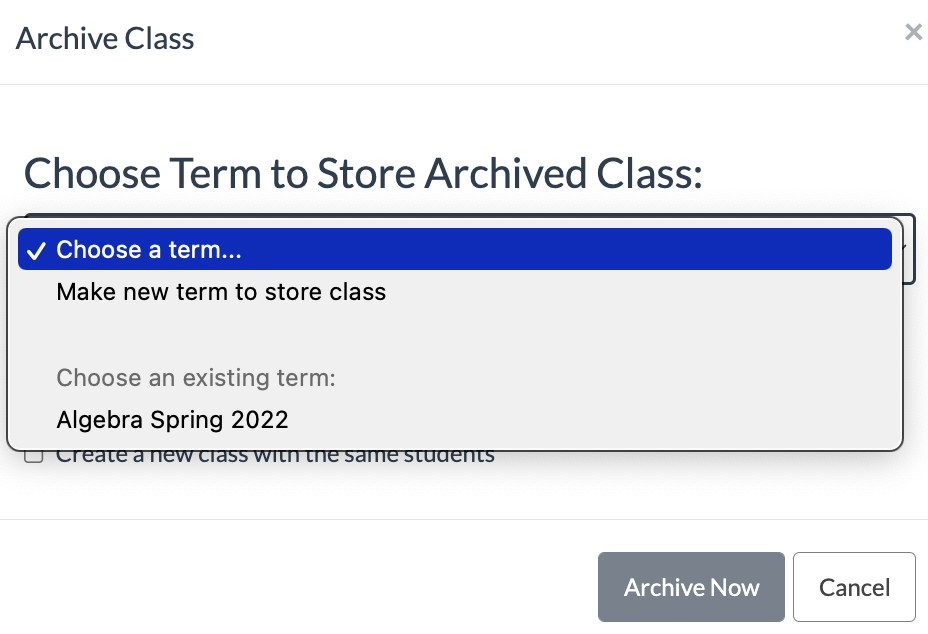
After selecting a class to archive, choose a term: either select an existing term or create a new one by selecting "Make new term to store class" and entering a name.
You can also choose to "Create a new class with the same students," which automatically re-registers students for the new class. This is a great option if you are archiving mid-year.
Additionally, when creating a new class with the same students, you can choose to “Carry over some assignments to new class.” This feature allows you to select specific assignments to retain in the current grading period while archiving all other assignments.
Once you have made your selections, click “Archive Now.”
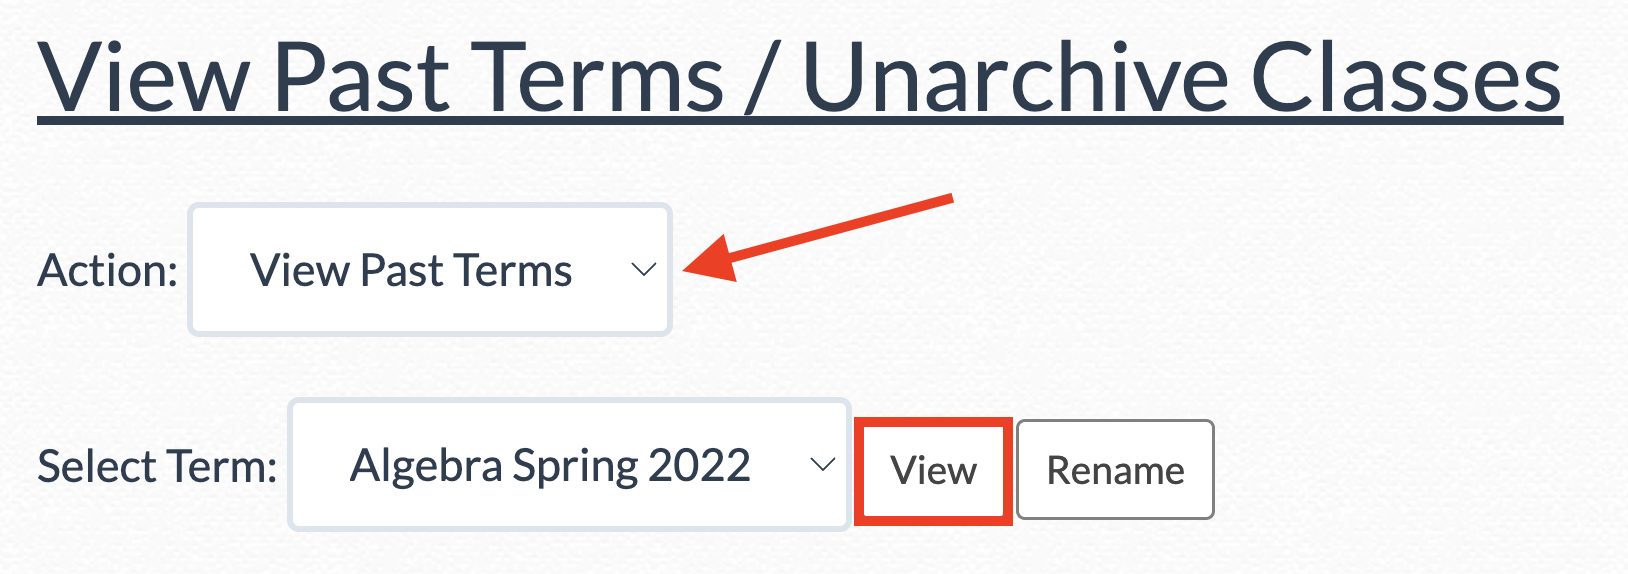
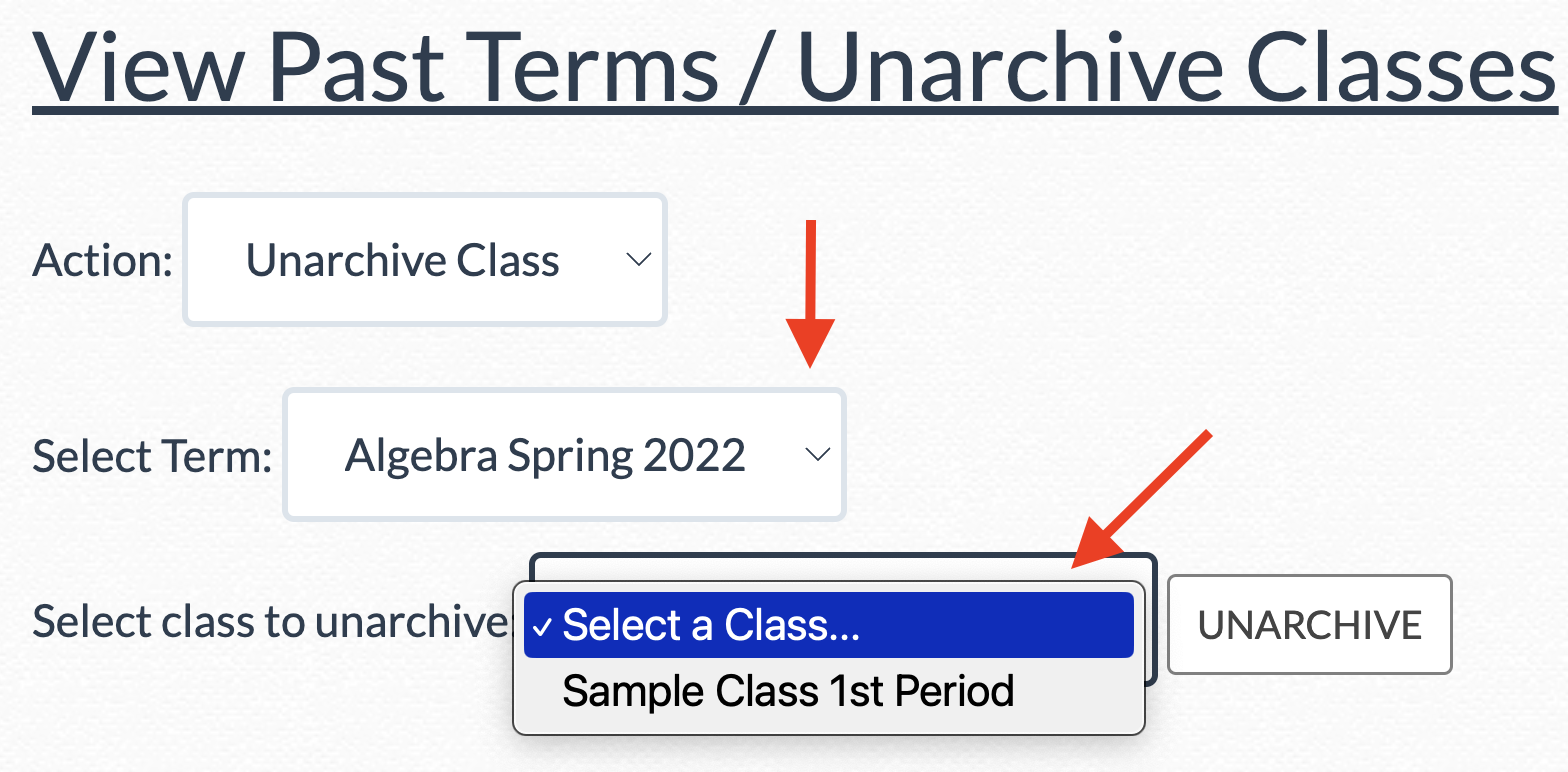
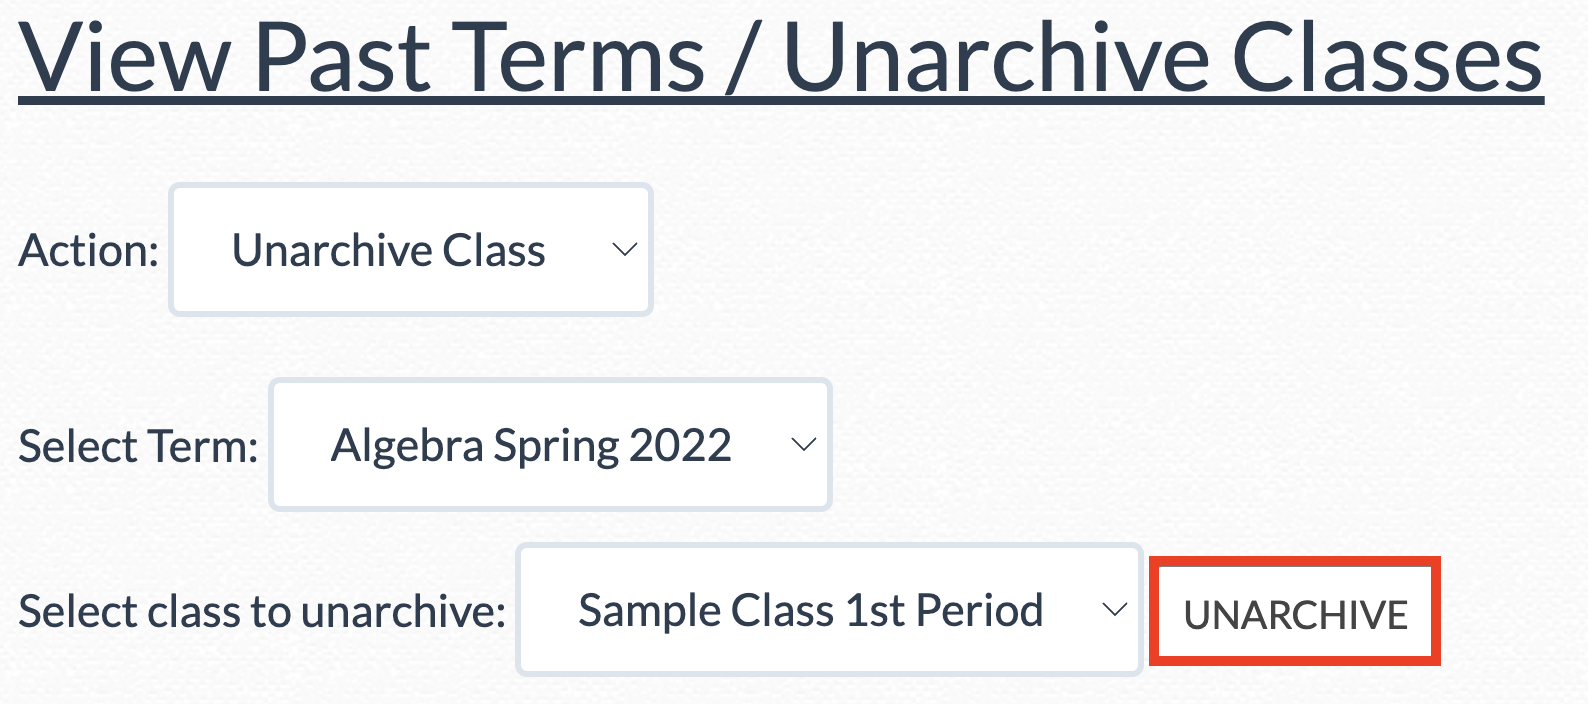
Click on “View Past Terms/Unarchive Classes” below your classes.
To view data from past terms, first select “View Past Terms” from the top drop-down menu, then choose the term you want to see data for, and finally click “View.”
From there, you can view the assignments and data from the archived term. To return to current content, click “Back to Current Term.”
You can disable the DeltaMath calculator for specific classes by clicking the icon underneath your classes. This action only needs to be done once.
A icon should appear in a new column for every class in the table above. Click on the icon to enable or disable the student calculator. A grayed-out icon indicates the calculator is disabled, while a black icon indicates it is enabled.
Note:This can be done on a class-by-class basis, not for individual assignments. Otherwise, a student could simply visit another assignment to have calculator access. For instance, if you only want to turn off the calculator for tests, you should toggle it off at the class level before each test. After the test, you would toggle it back on.
Note: All teachers must have a DeltaMath PLUS or INTEGRAL license to utilize the coteacher feature.
Once the coteacher(s) add the Google Classroom class, DeltaMath will recognize them as coteachers.
Click “manage” to see which teachers are currently listed as coteachers for the Google Classroom class.
You can remove yourself from a class by clicking the “remove self” button, or you can remove a coteacher by clicking the "remove" button next to their name.
Note: You cannot invite a Google Classroom teacher to be a coteacher by selecting “manage." Instead, the coteacher will need to set up the integration using the steps listed above. Then, you will see the coteacher listed in the table when you click “manage.”


 icon underneath your classes. This action only needs to be done once.
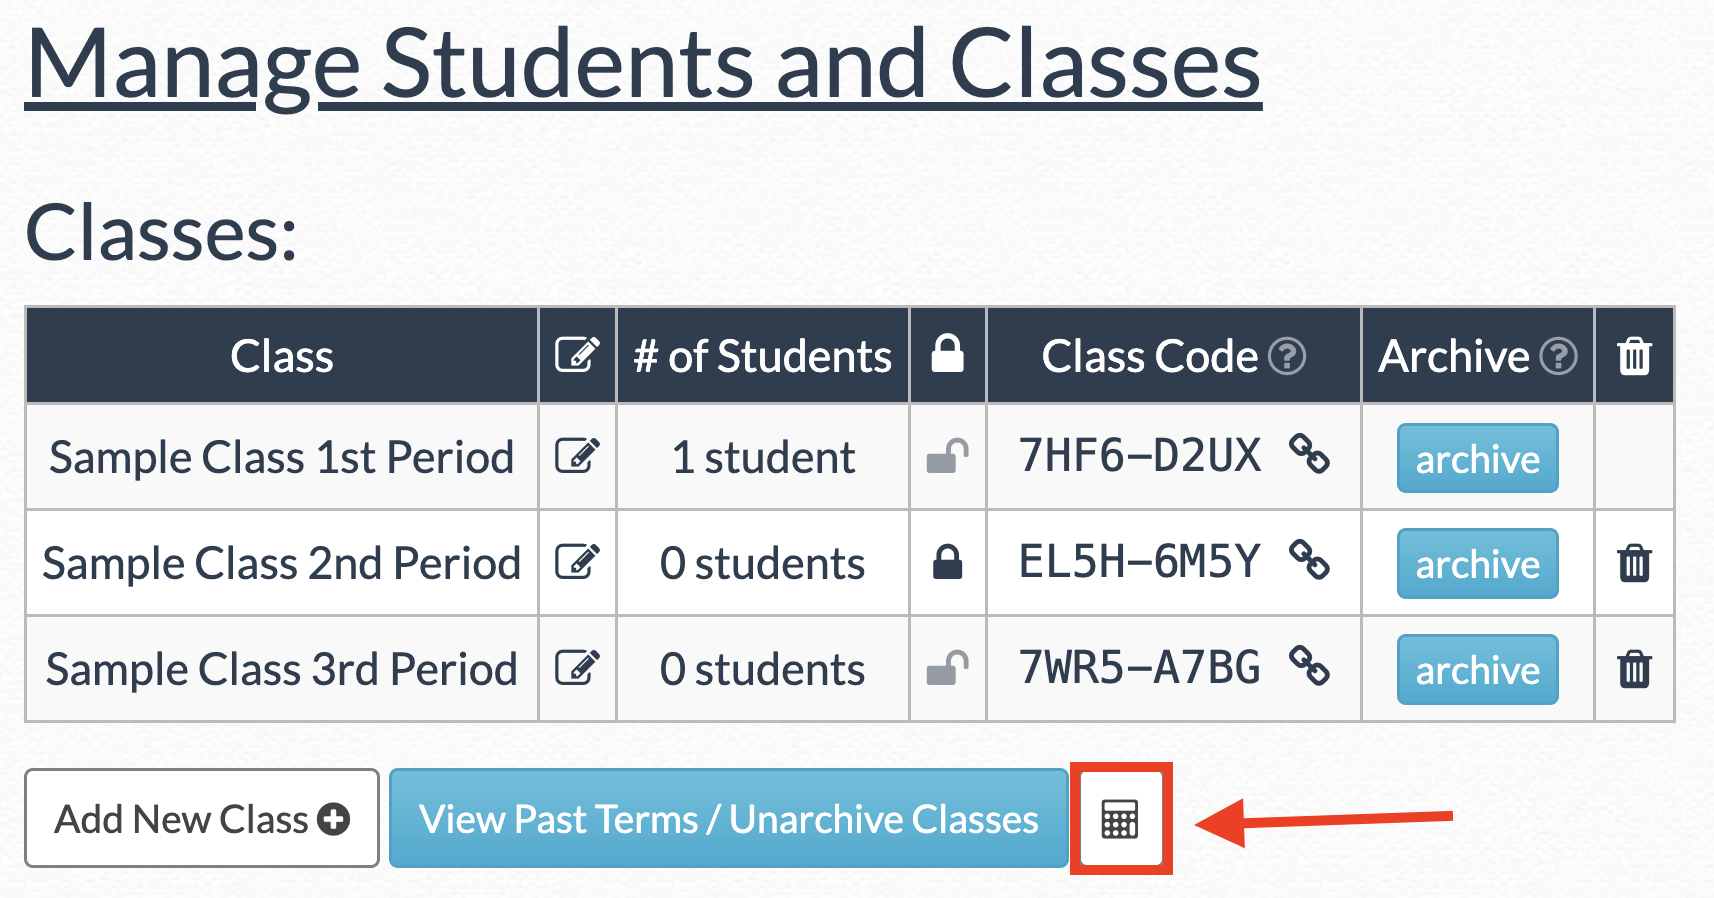
 icon indicates the calculator is disabled, while a black