Introduction to a Guided Sentence Question
| A “Guided Sentence” question requires students to fill in the blanks or use drop-down menus to answer. | 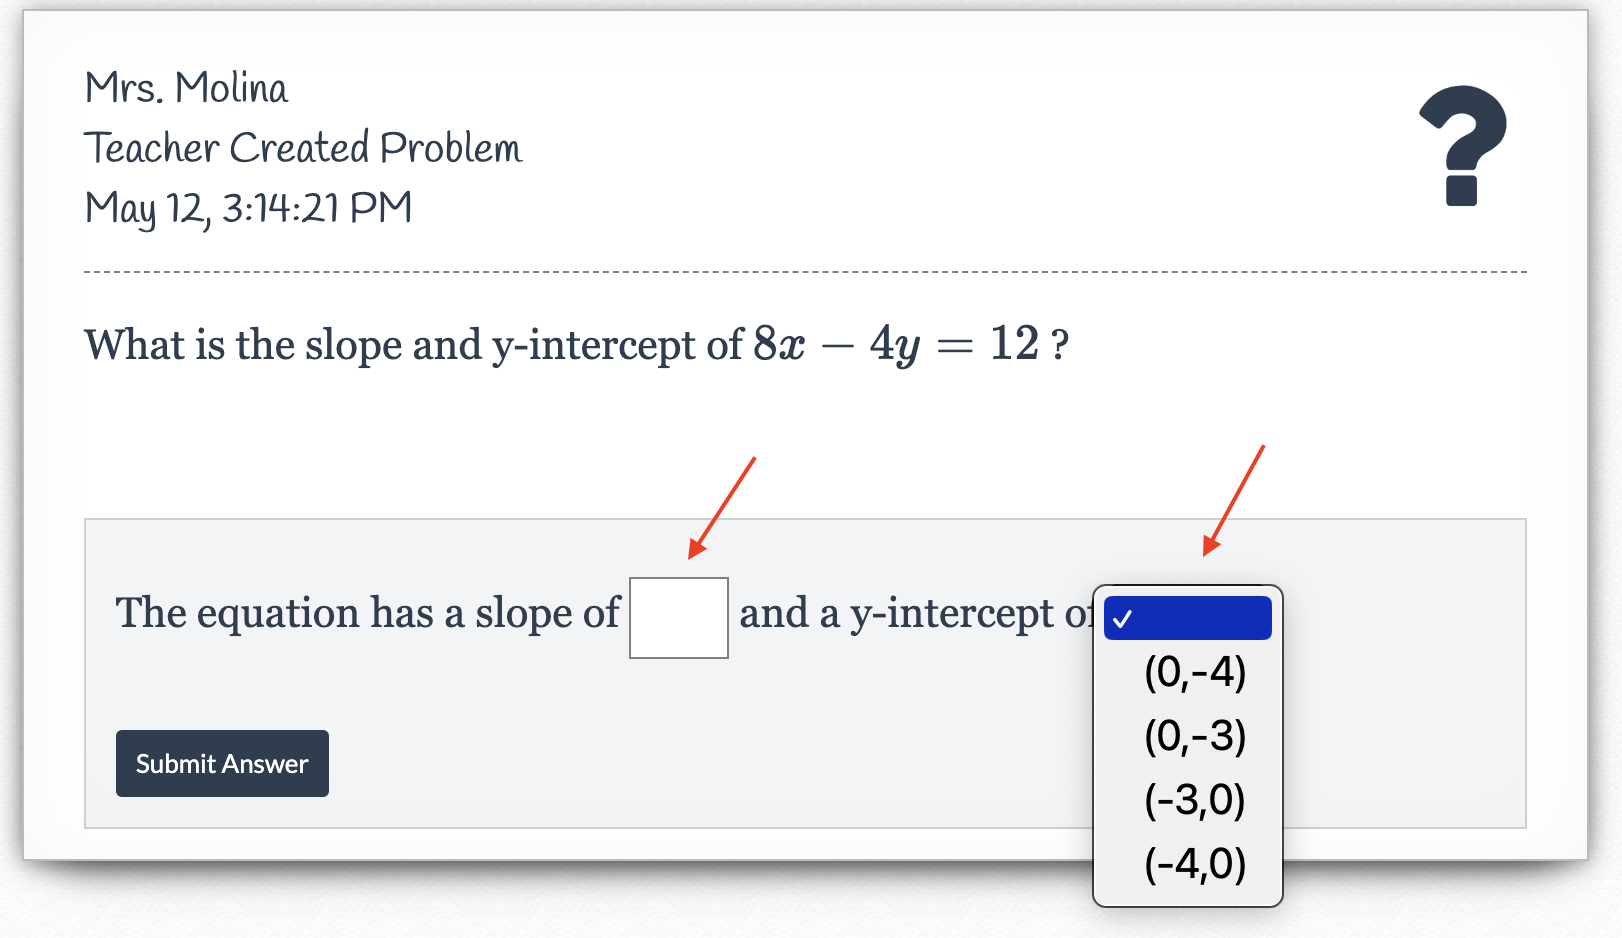 |
Create a Guided Sentence Question
| Enter your question in the “Question Prompt” box. | 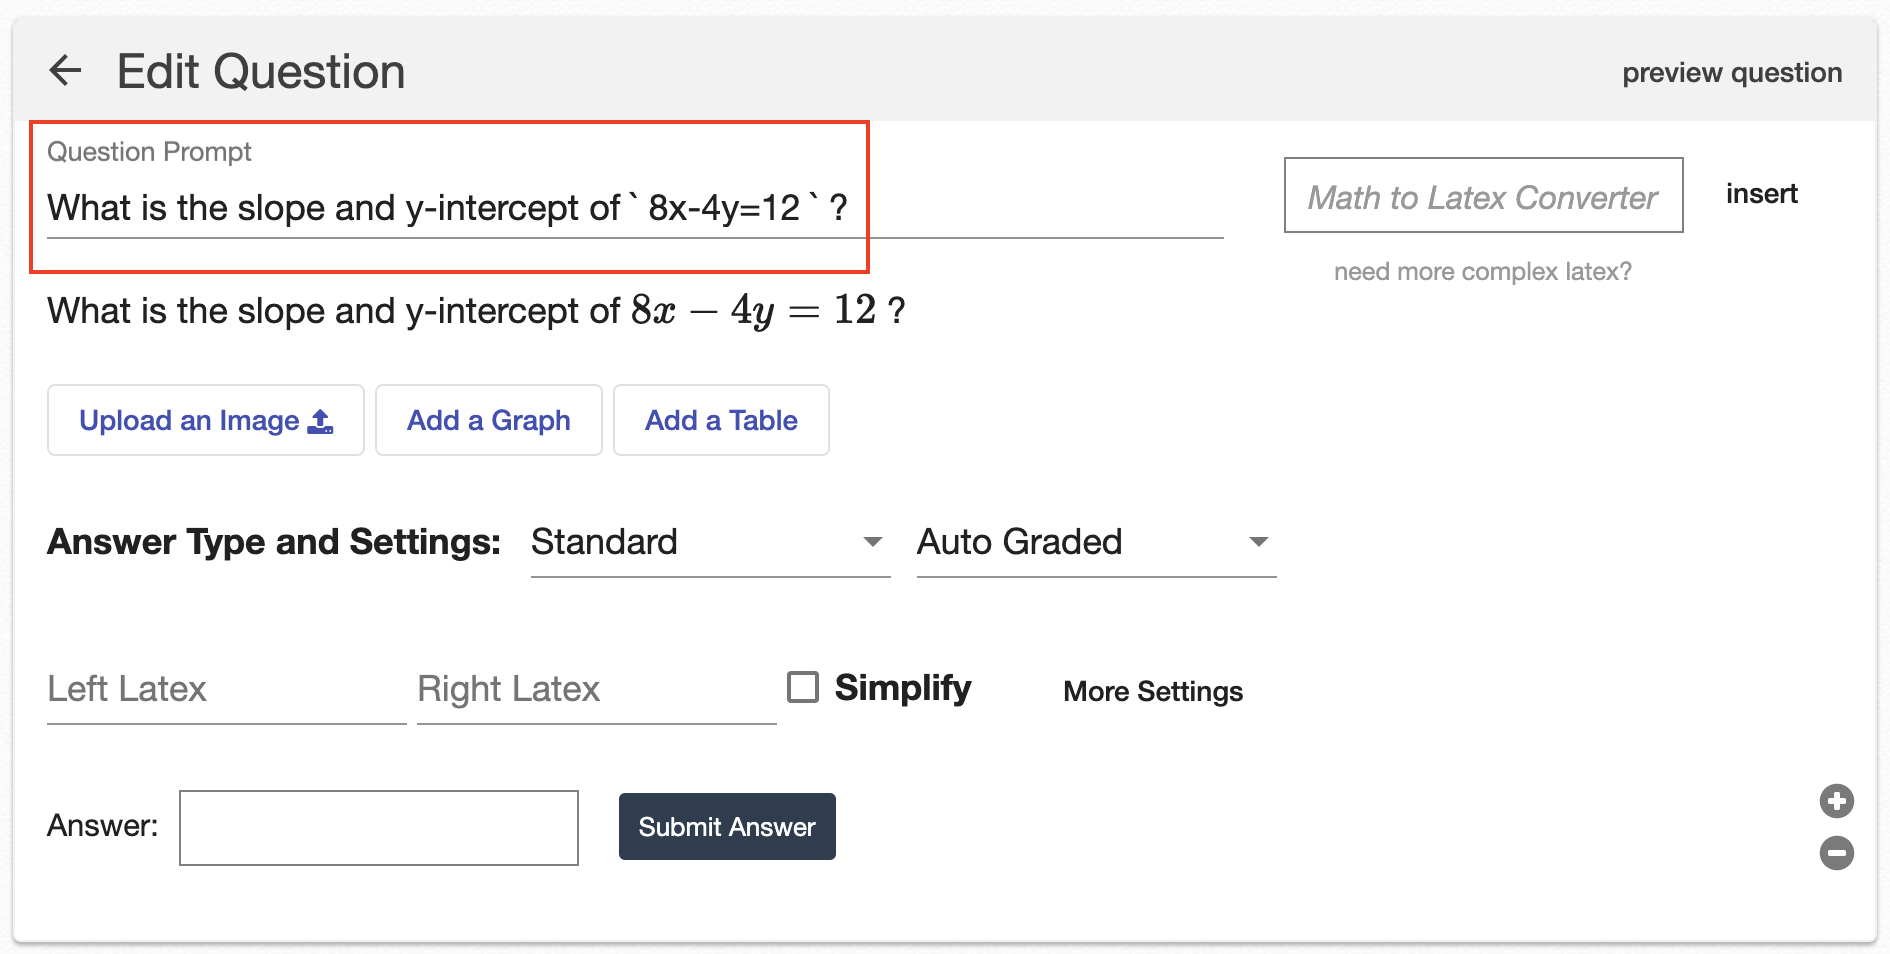 |
| Be aware: you have the ability to add images, graphs, tables, or LaTeX to your question. For more information, refer to this article. | 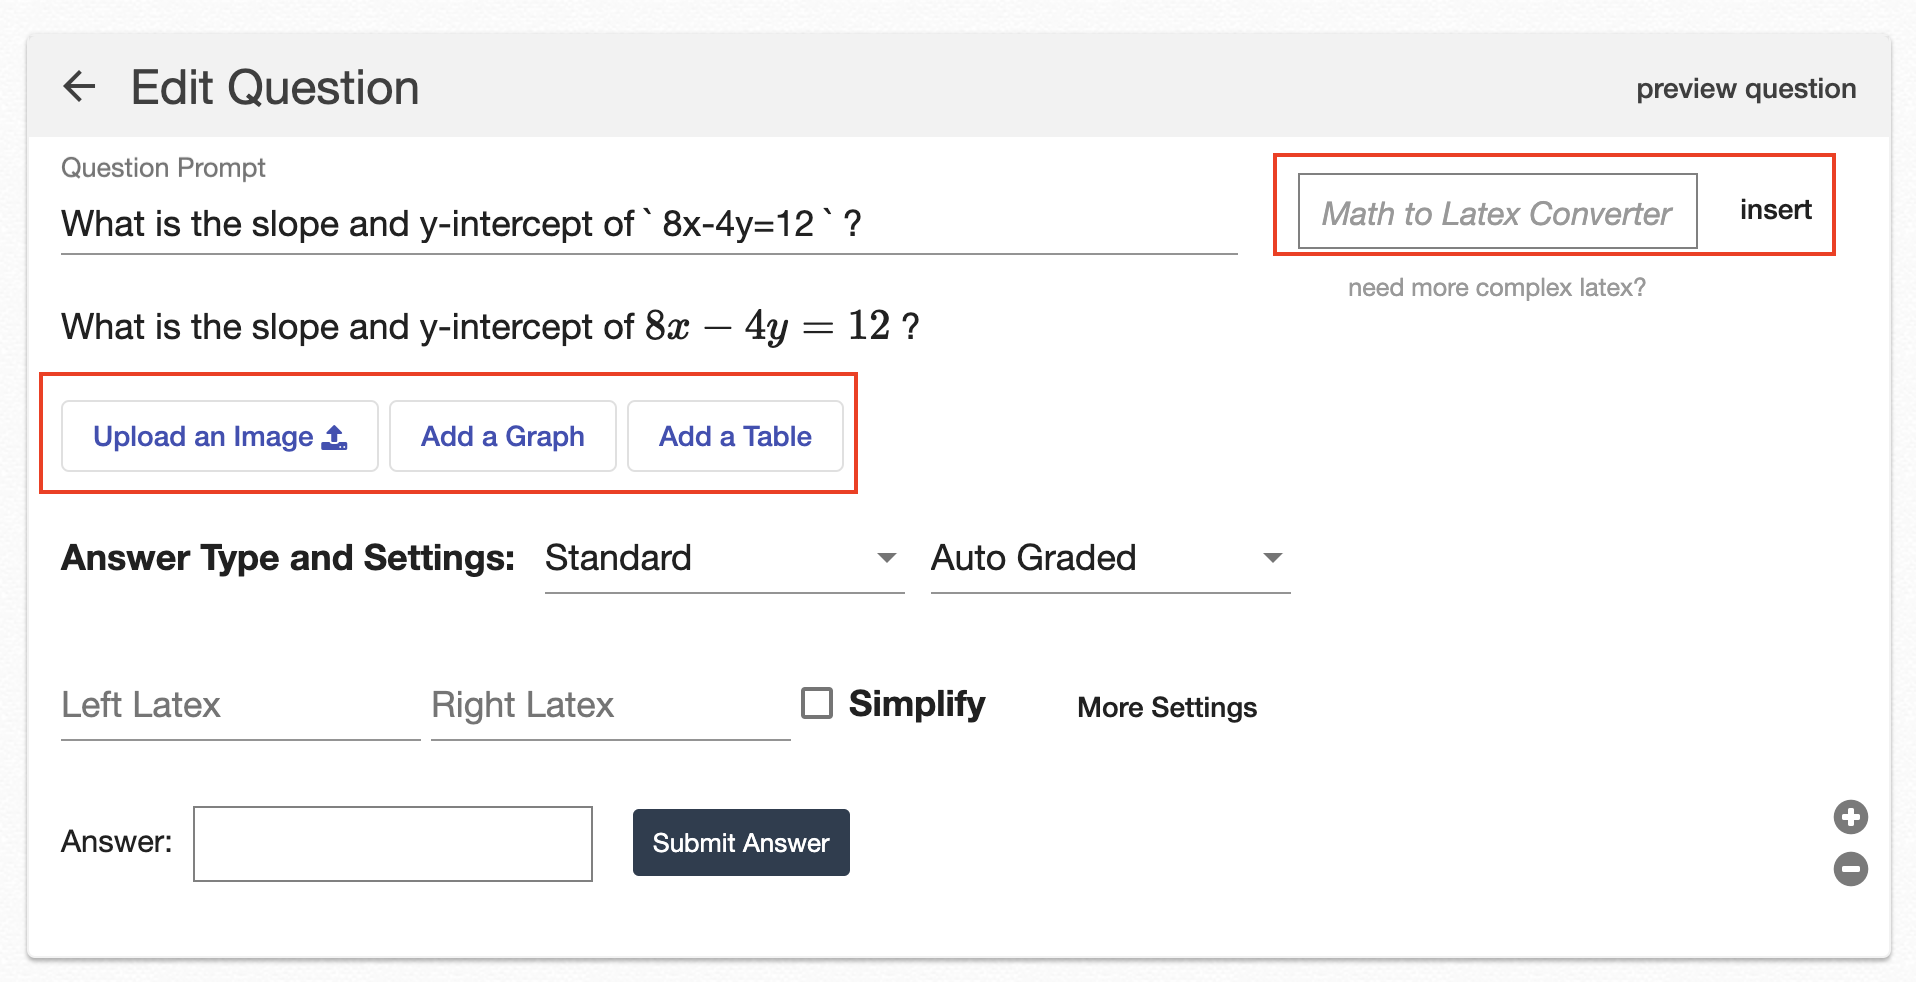 |
| Select “Guided Sentence” from the drop-down menu. | 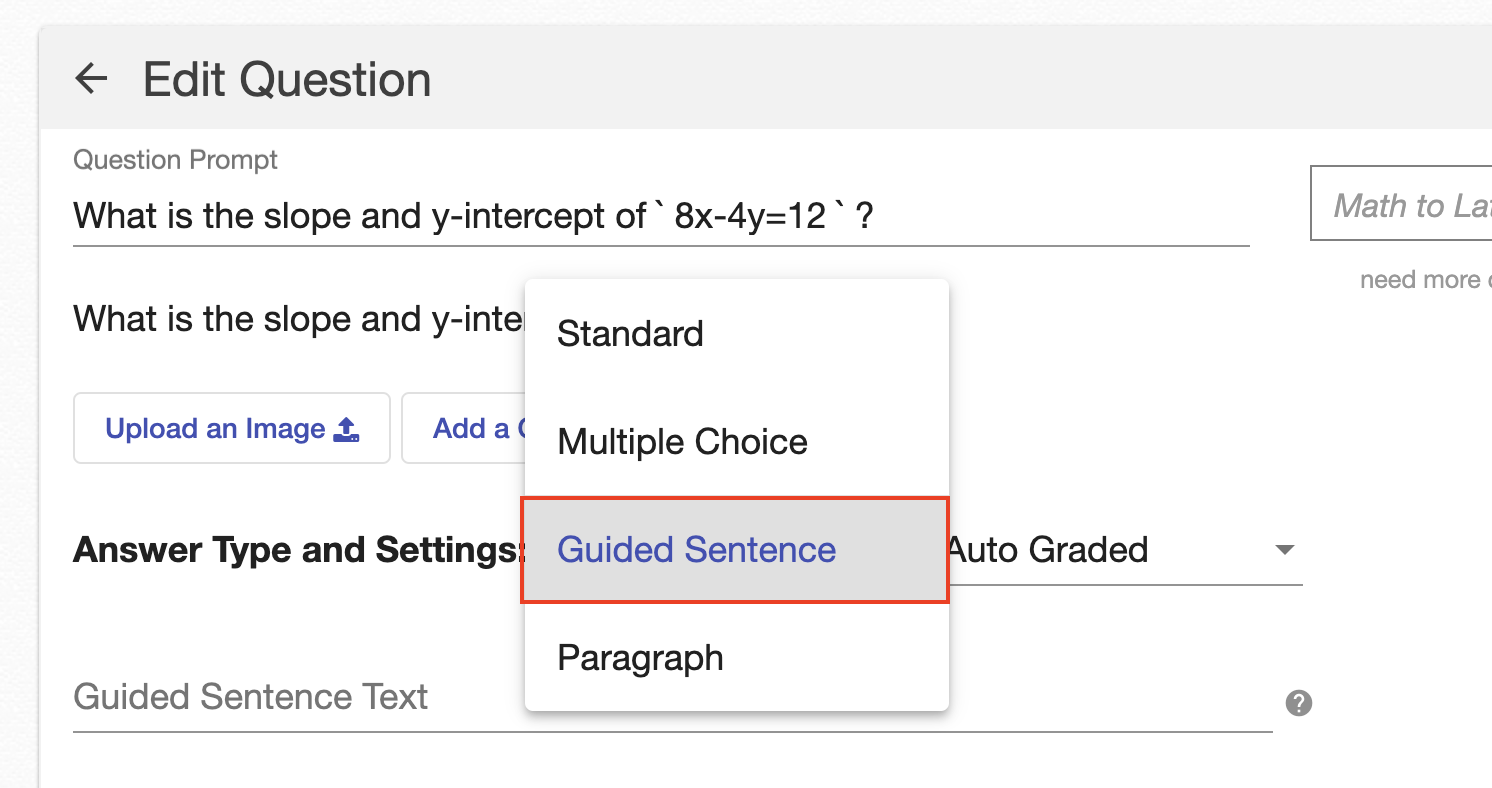 |
| Beneath “Guided Sentence Text," begin to type in the text of your guided sentence. | 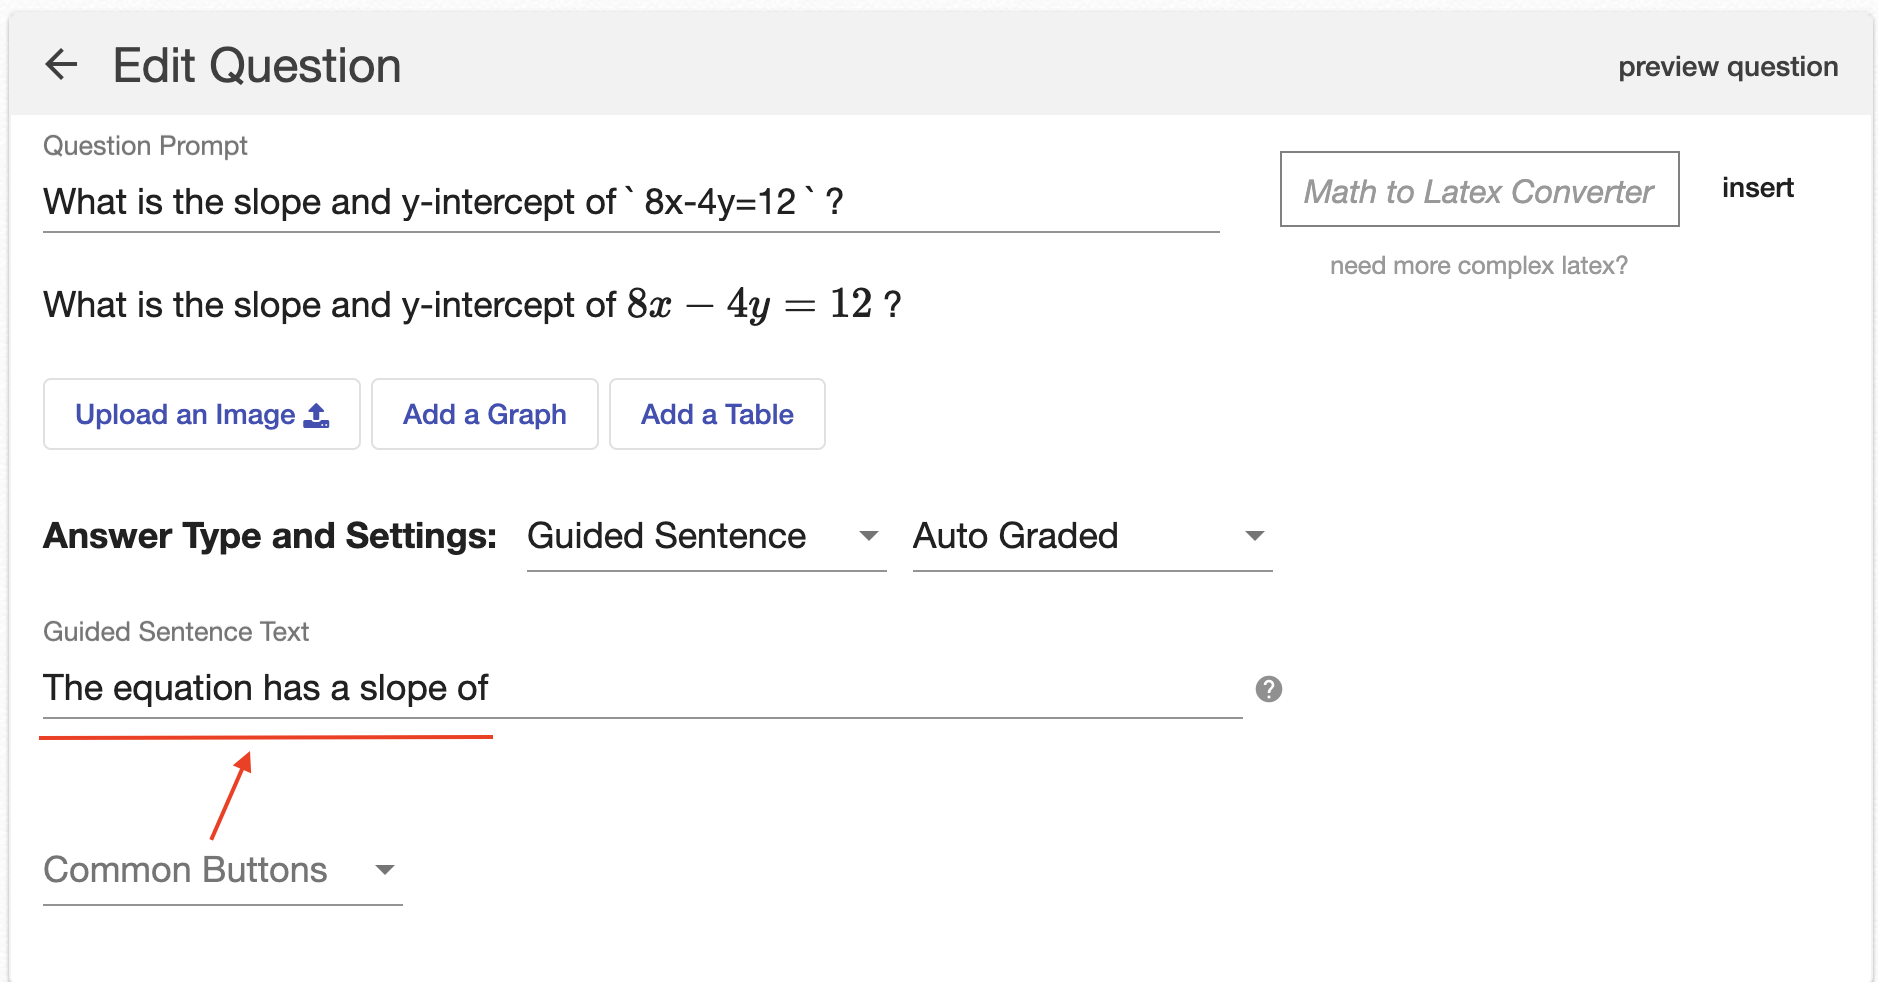 |
| Once you reach a point in your sentence where you would like the student to enter a response, type the exact text: “QUESTION1” (i.e., the first question). Upon entering this text, a row will appear below “Student Input Settings and Answers” where you can further customize the question. | 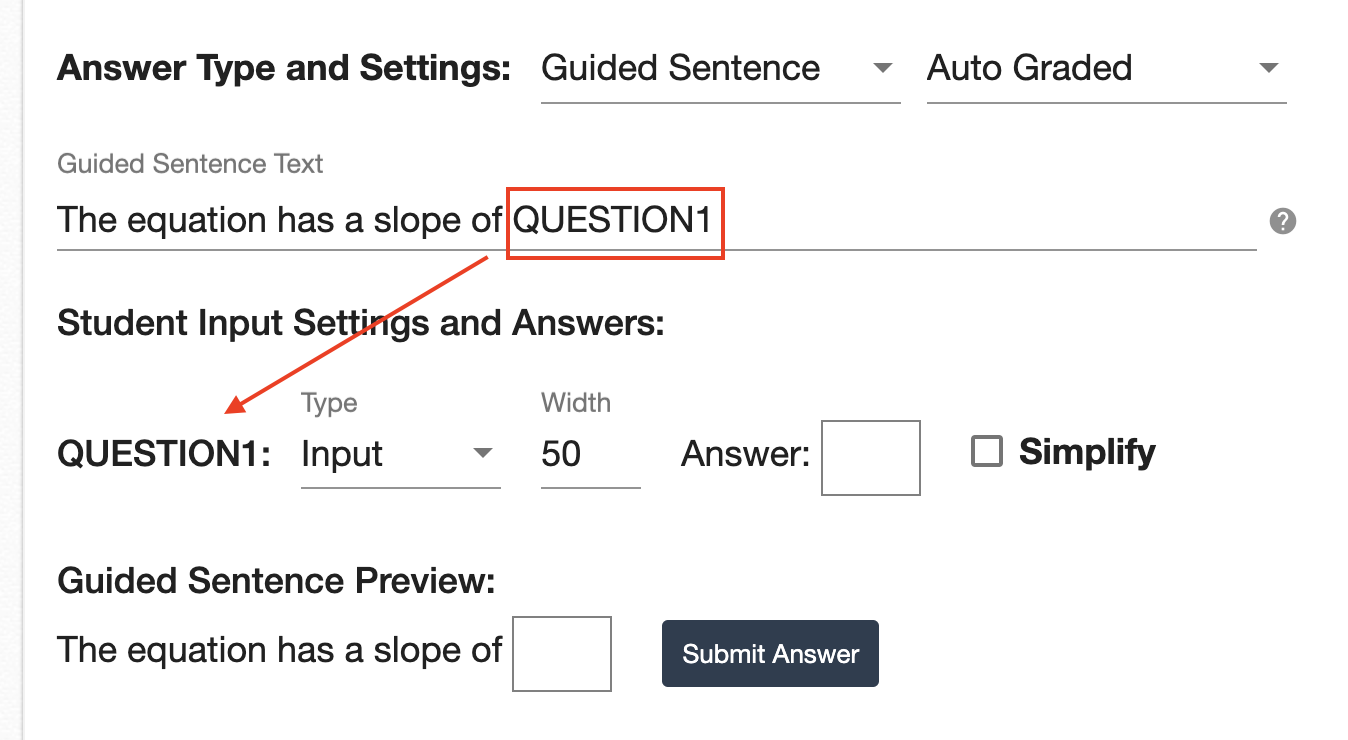 |
|
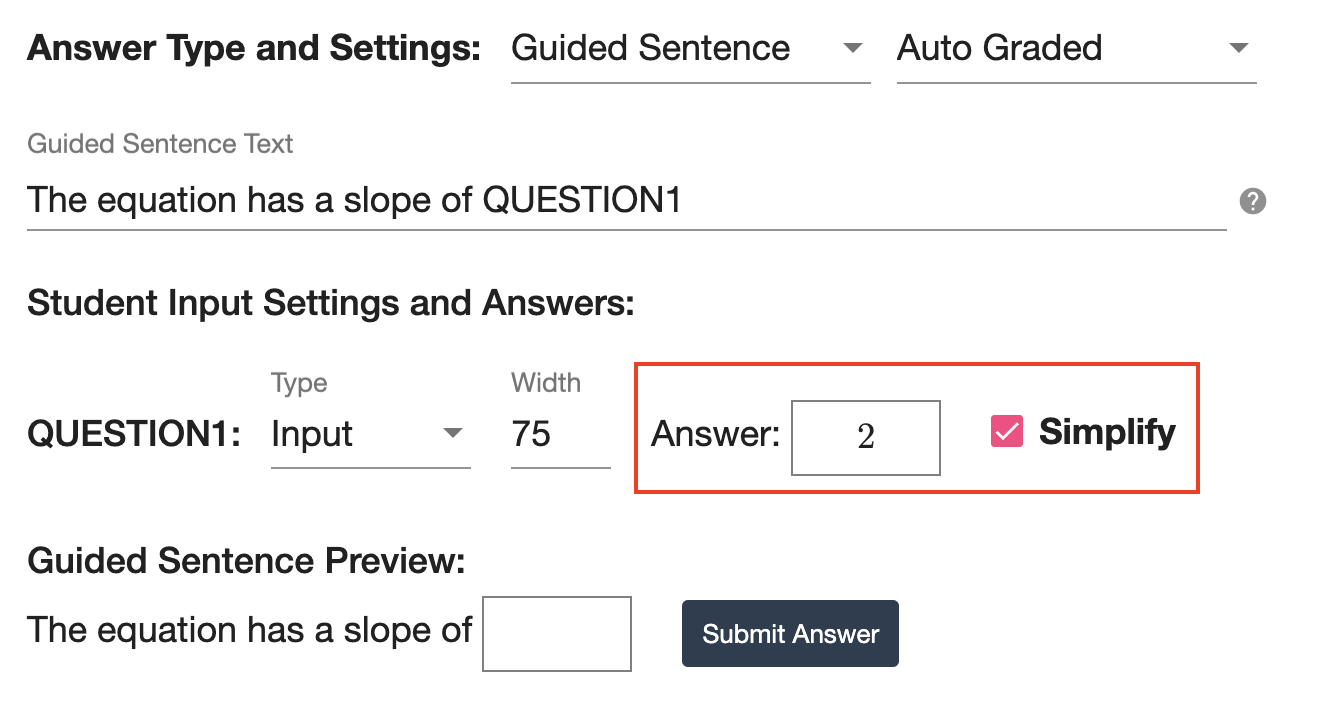
In the example on the right, we've selected the “Input” answer type. This means students will need to type in a mathematical response.
A preview of your guided sentence question will appear below, under “Guided Sentence Preview.” |
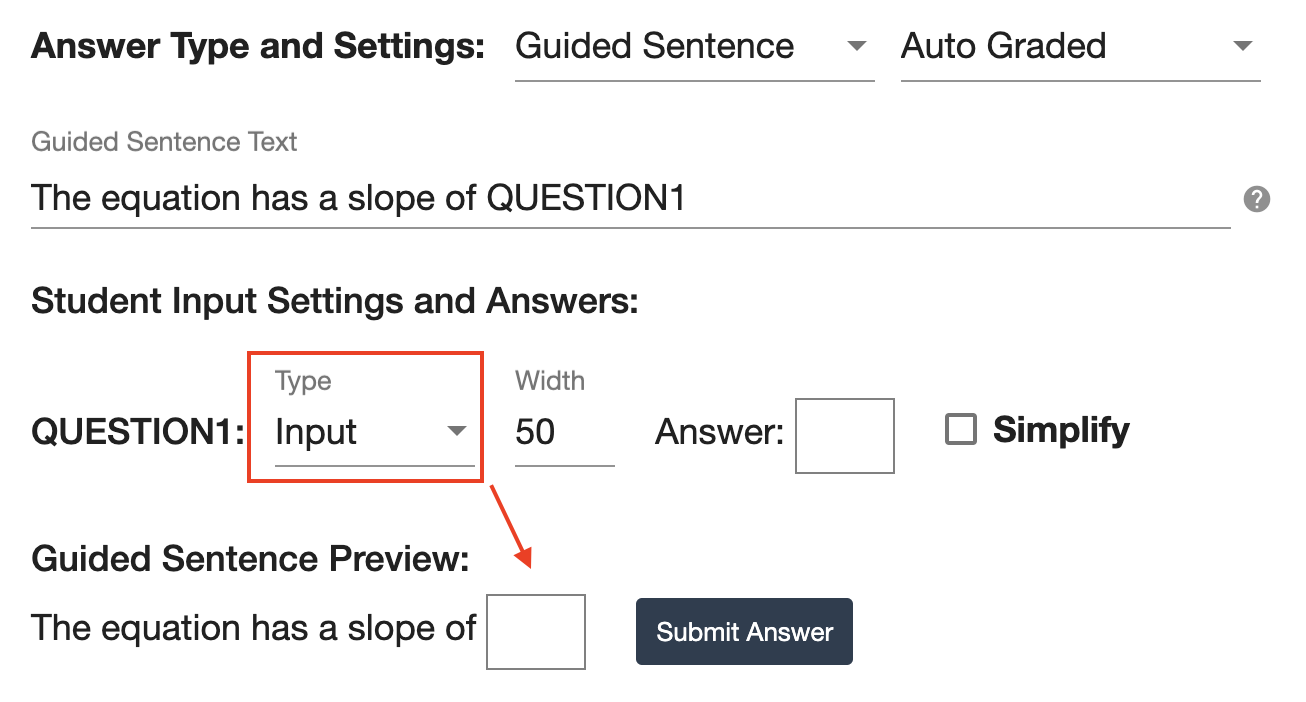 |
| Use the “Width” setting to adjust the width of the answer box, if desired. | 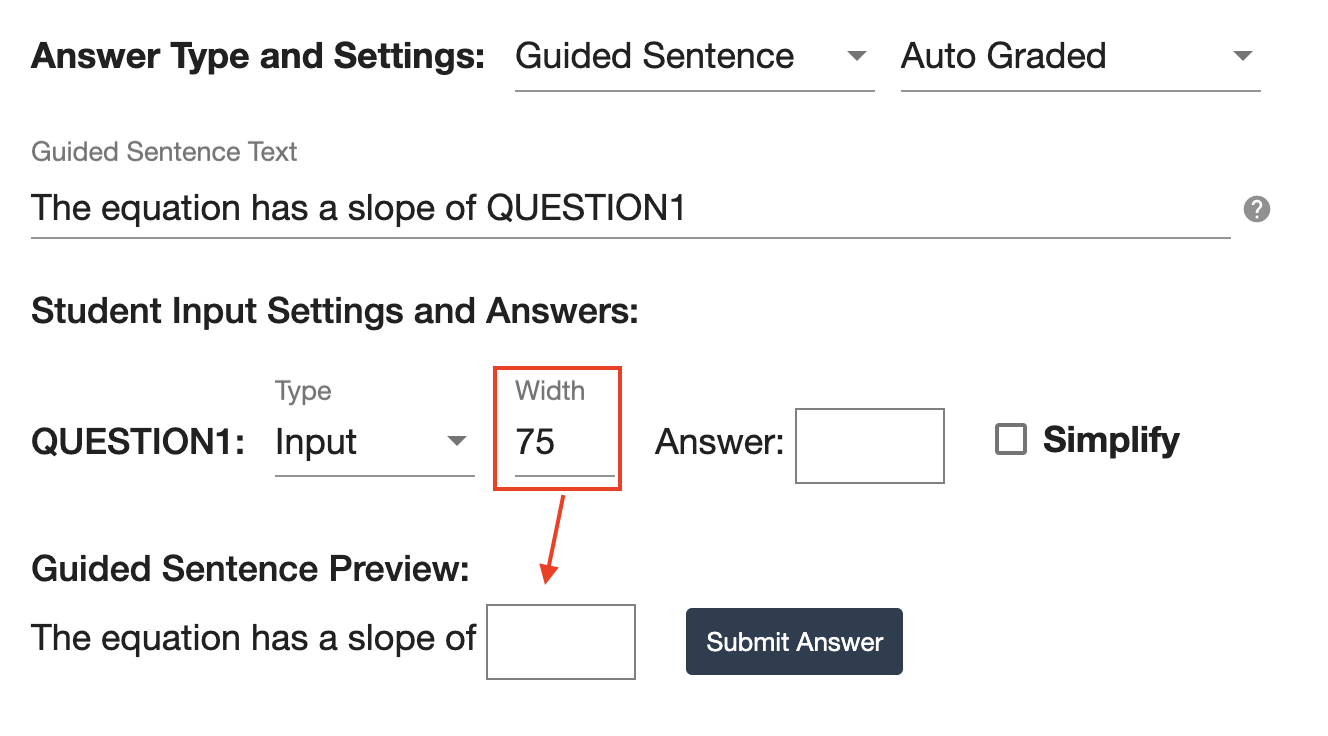 |
|
Enter the value or expression that you want the software to use in marking answers correct or incorrect. Select “Simplify” if you only want simplified answers to be marked correct. For example, if you do not select “Simplify,” as shown in the image on the right, a student would be marked correct if they input 8/4. |
 |
| If you would like students to have access to a common button when entering their answer, you can select a common button from the drop-down menu. For more information about common buttons, click here. | 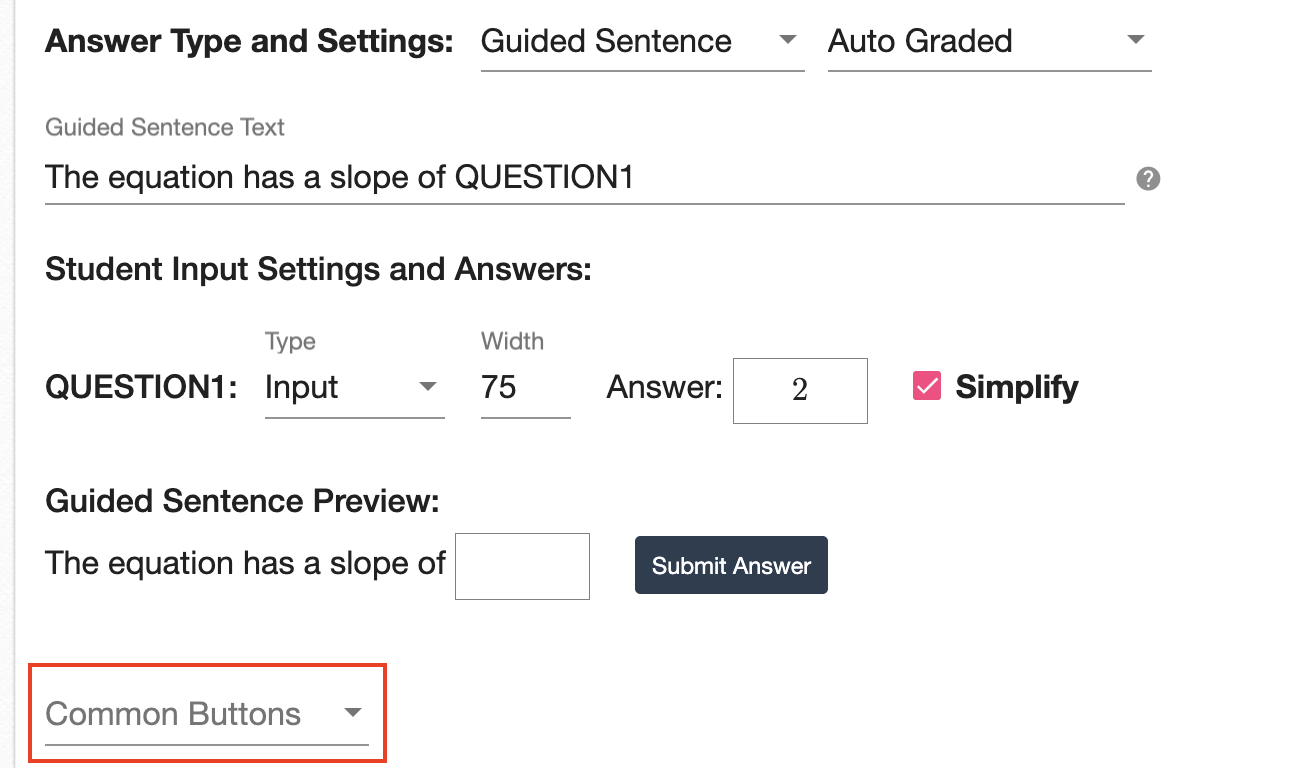 |
| You can then continue writing the text of your guided sentence question. | 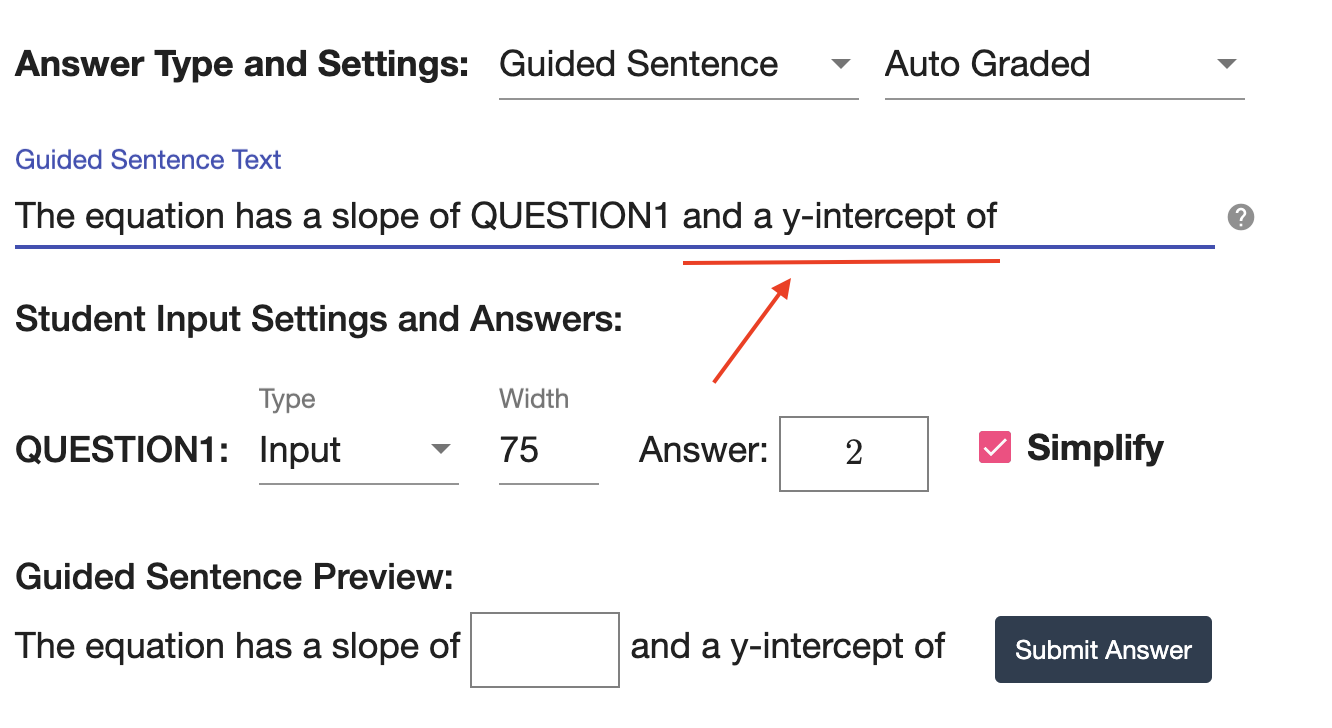 |
|
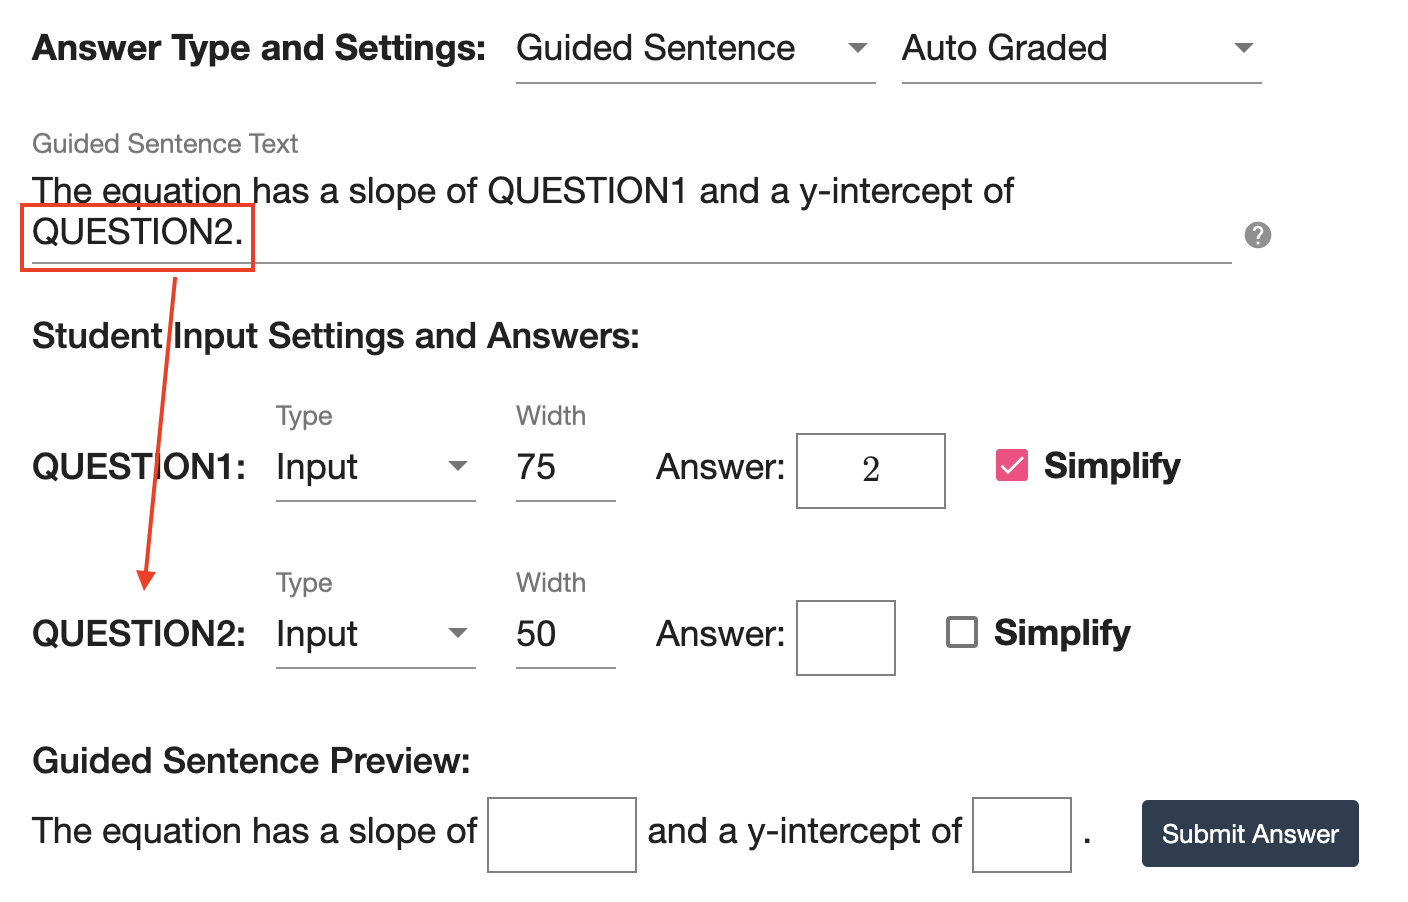
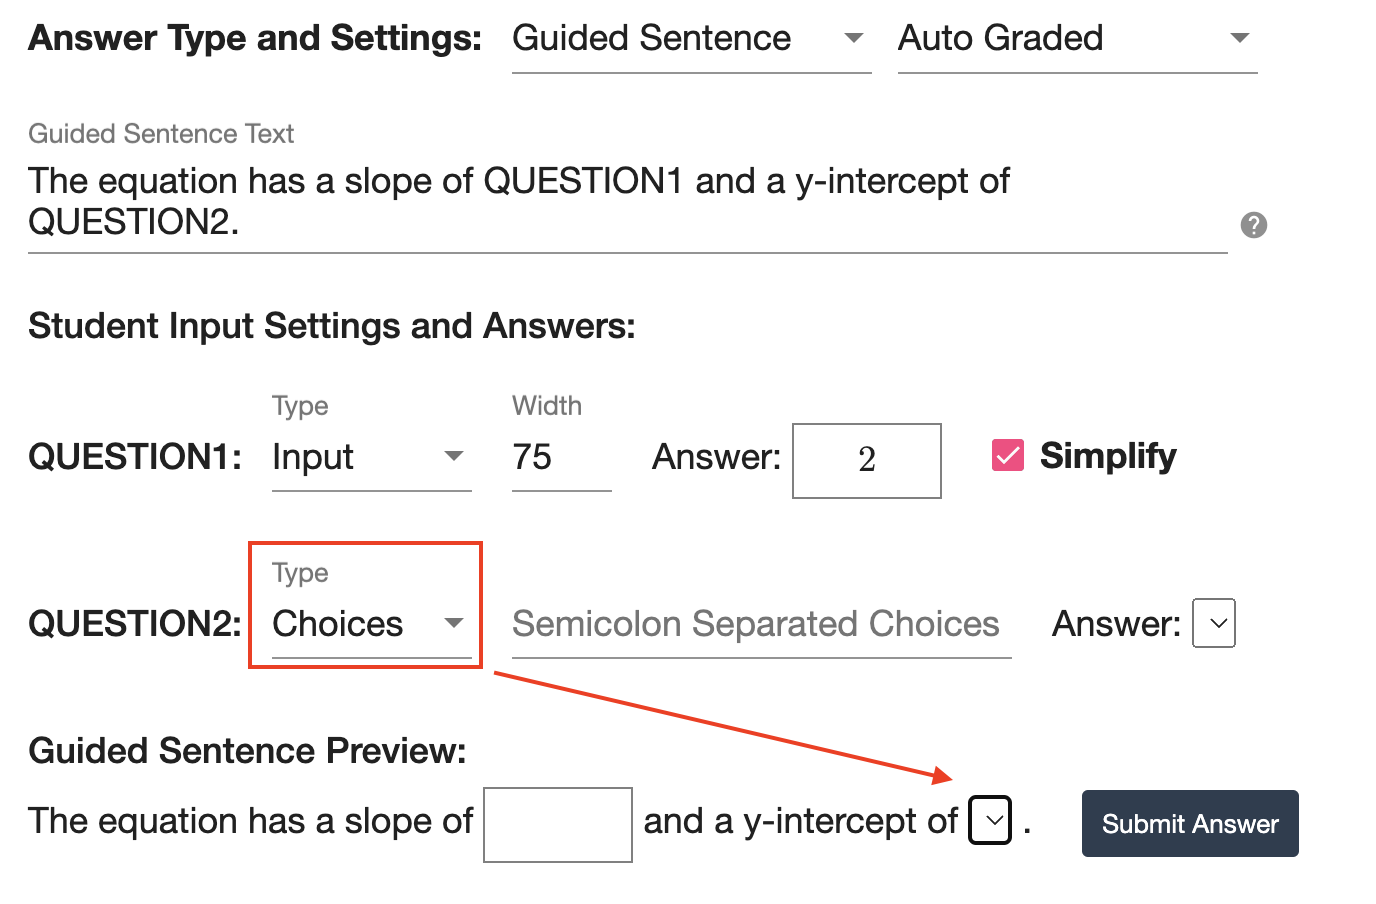
Once you reach a point where you want the student to enter another response, type the exact text: “QUESTION2” (i.e., the second question). After entering this text, a second row will appear below “Student Input Settings and Answers,” allowing you to further customize the question. Note: You can enter QUESTION3, QUESTION4, etc., for additional student responses. Each teacher-created question can include up to 15 guided sentence questions. |
 |
|
For this second example, we will select a “Choices” answer. This means students will need to select the correct answer from a drop-down menu.
Reminder: A preview of your guided sentence question will appear in the space below, under “Guided Sentence Preview.” |
 |
|
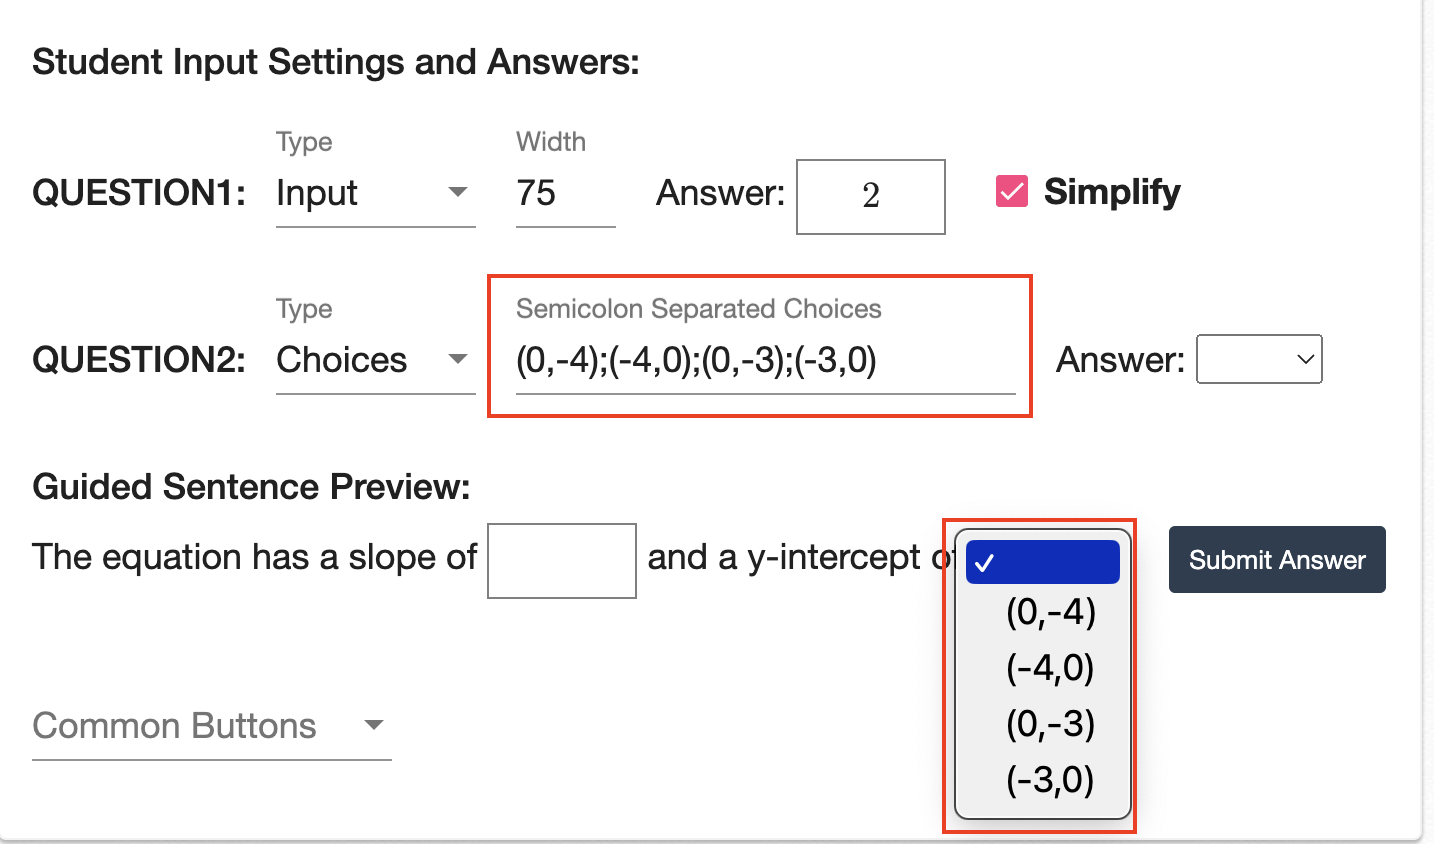
Once you select “Choices," you'll see a spot to enter answer options for the drop-down menu. Enter as many choices as needed, separating each choice with a semicolon.
To preview, click on the drop-down menu under “Guided Sentence Preview.” |
 |
| Once your answer choices are entered, select the correct answer. If you don't select a correct answer, all student submissions will be marked as incorrect. | 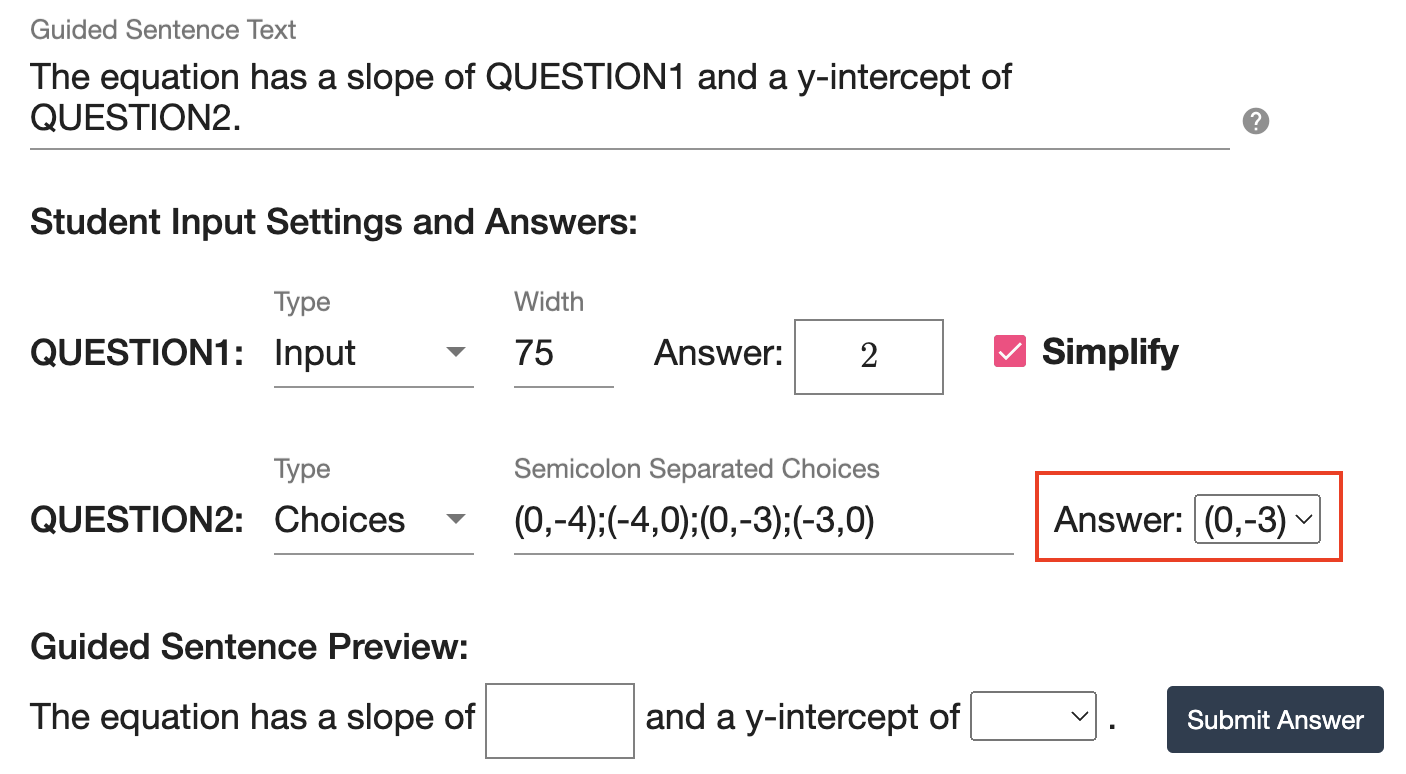 |
| Note: If you select "Input," the default is math type (LaTeX) and there is no way to change it to plain text. If you select "Choices," the default is plain text and there is no way to change it to math type (LaTeX). |
Preview a Guided Sentence Question
| You can preview your guided sentence question by selecting “preview question” at top right. | 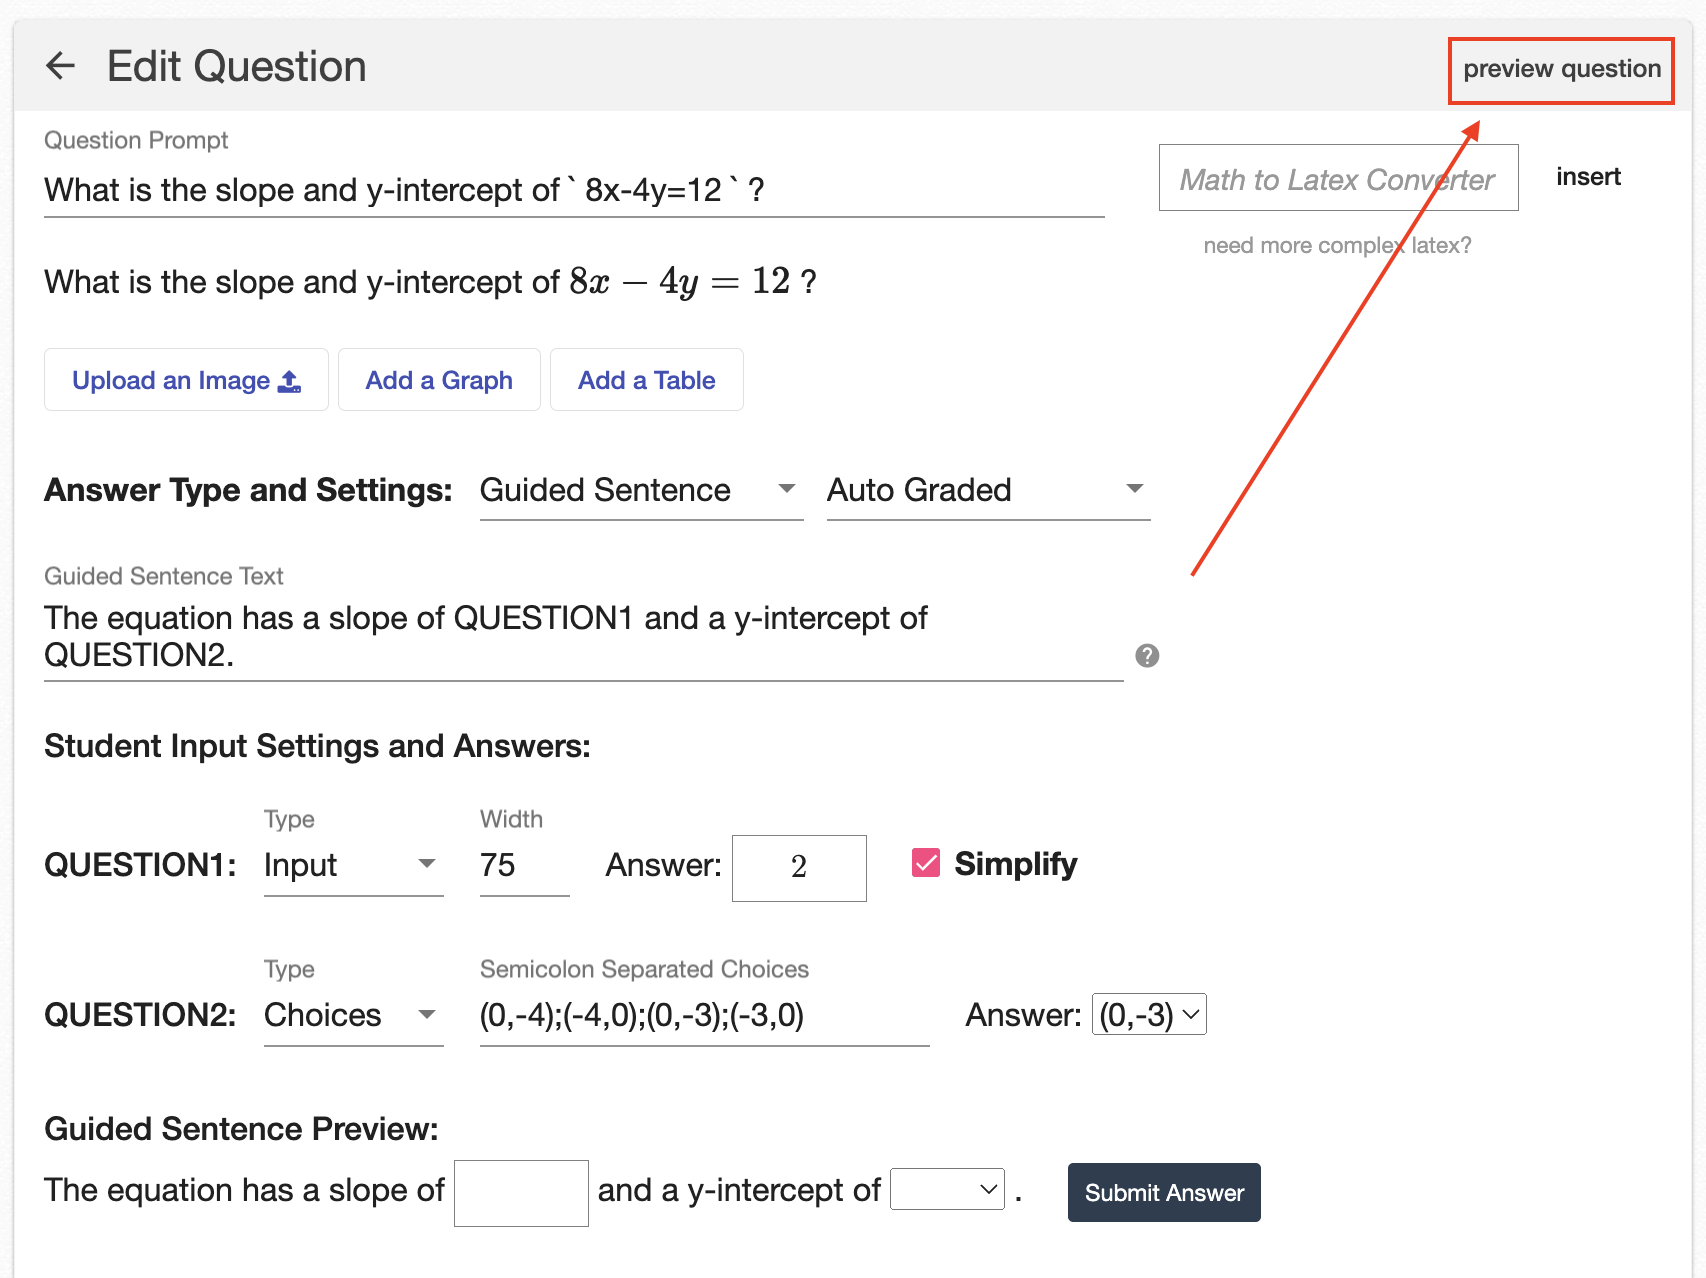 |
| Once selected, you'll be able to preview what the question will look like for students. | 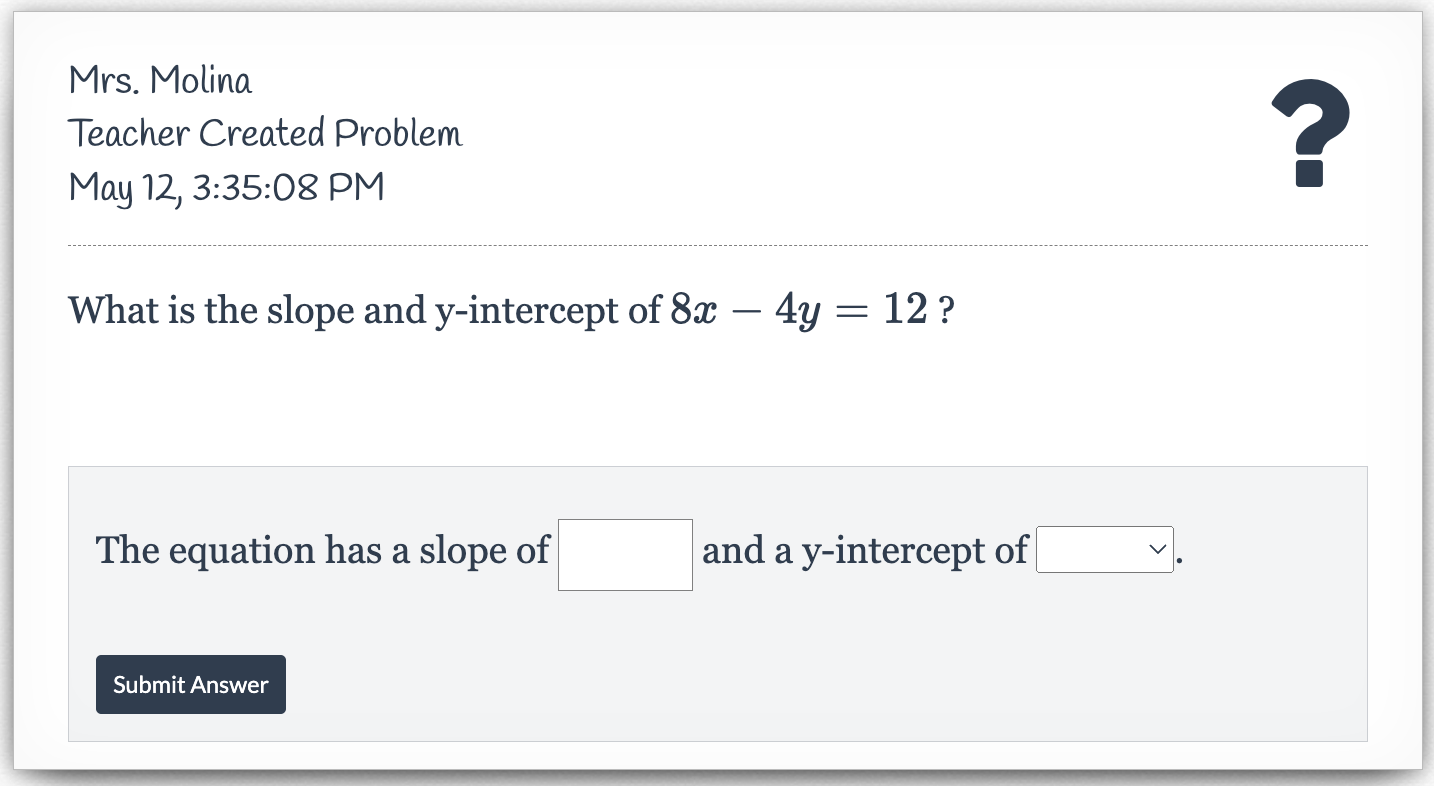 |
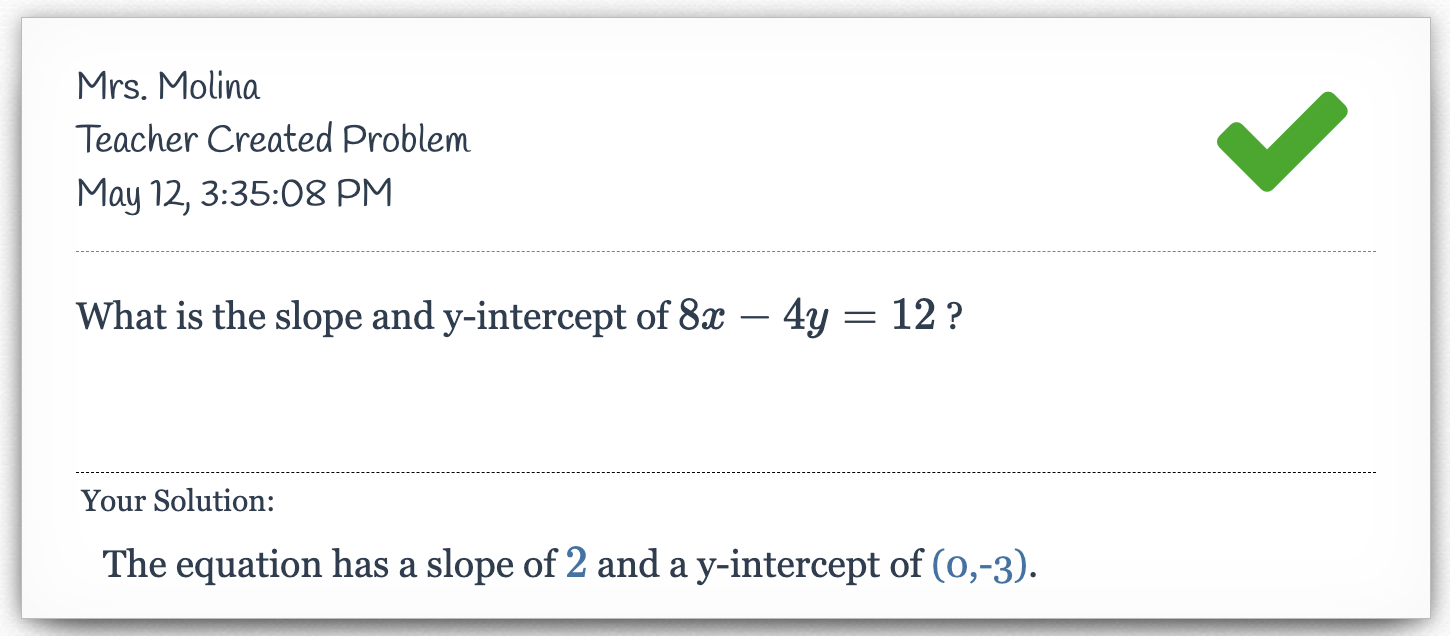
If you submit a correct answer, you should see a  icon. icon. |
 |
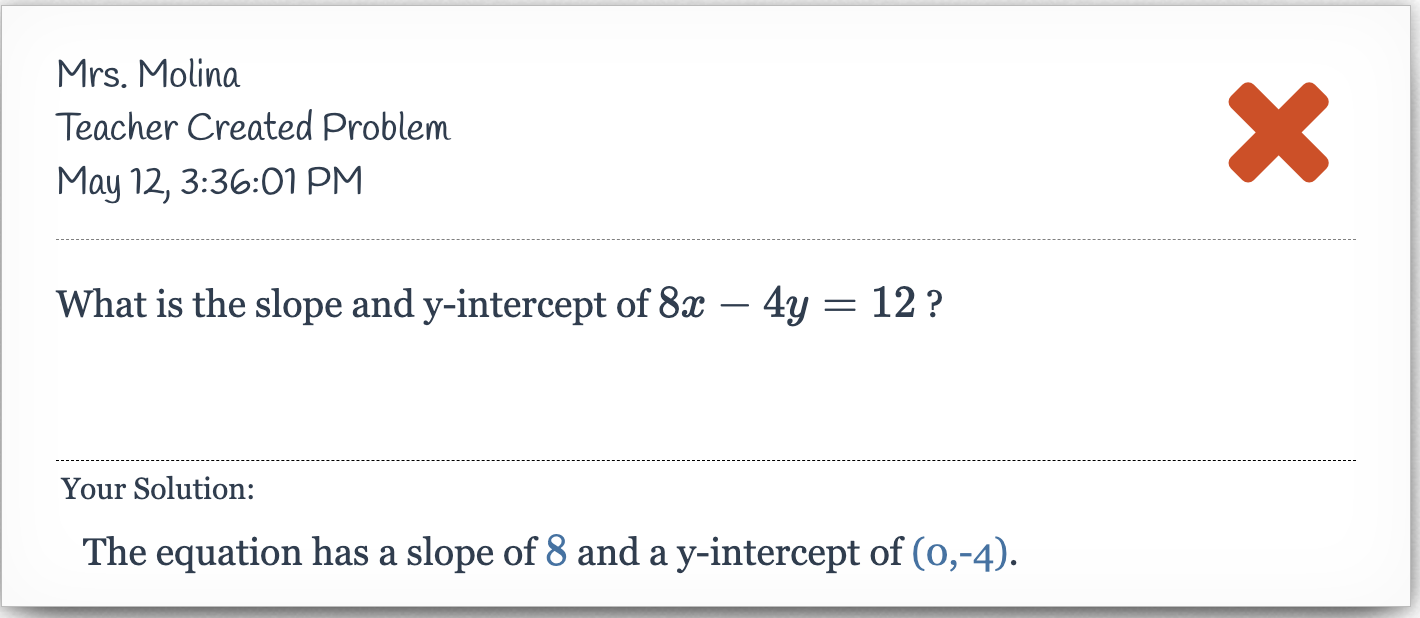
If you submit an incorrect answer, you should see an  icon. icon. |
 |
| Note: Partial credit is not automatically available for auto-graded questions. If a student answers all parts of a guided sentence question correctly, it will be counted as correct. If they answer any part incorrectly, it will be counted as incorrect. To learn how to override grades or give partial credit, click here. |
Grade a Guided Sentence Question
|
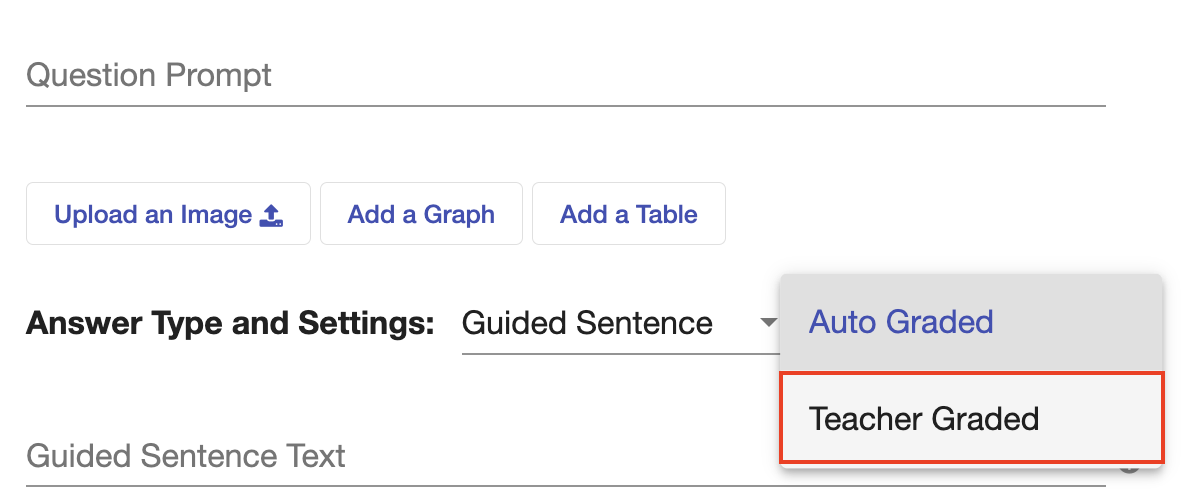
Guided sentence questions are set to “Auto Graded” by default, meaning they will be automatically graded as correct or incorrect based on the values you've entered as answers.
However, you can switch your grading to “Teacher Graded,” requiring you to individually grade student responses. |
 |
| From the student perspective, upon submitting an answer, they will not immediately see whether their response was correct or incorrect. Instead, they will see an icon indicating that this question is “Teacher Graded.” | 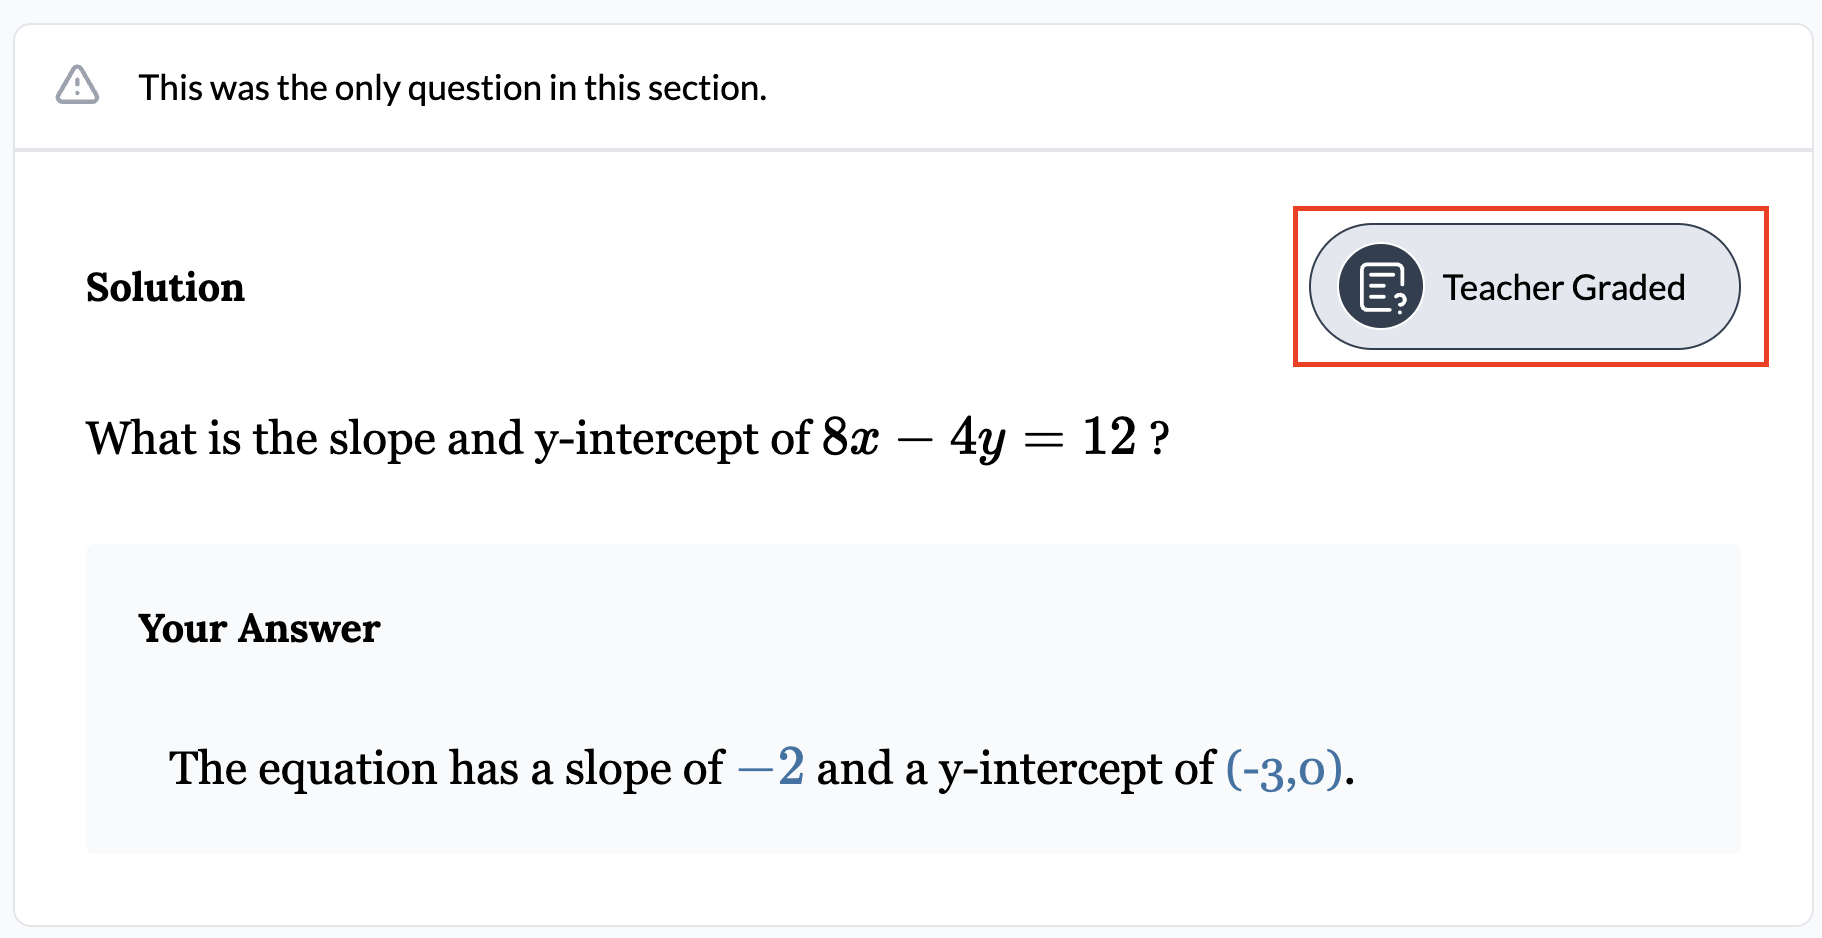 |
| To easily grade a teacher graded question, navigate to the assignment and select the name of the corresponding question above the column. | 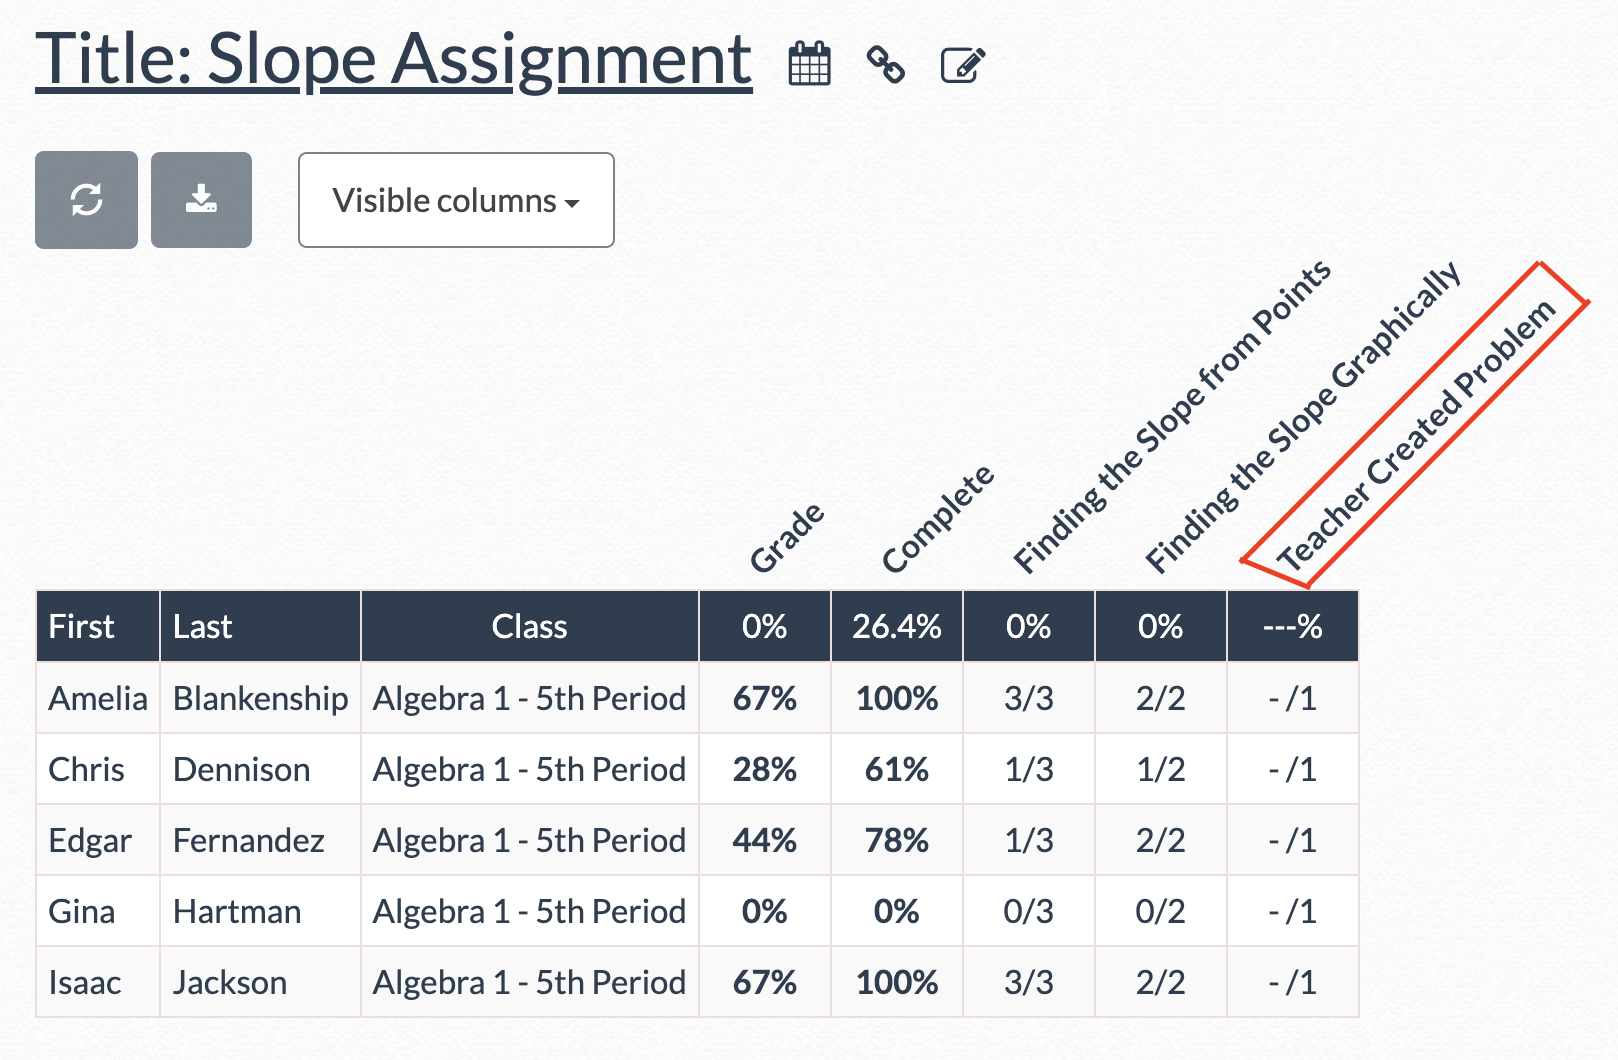 |
| From there, you will see the various answers students submitted for the question. | 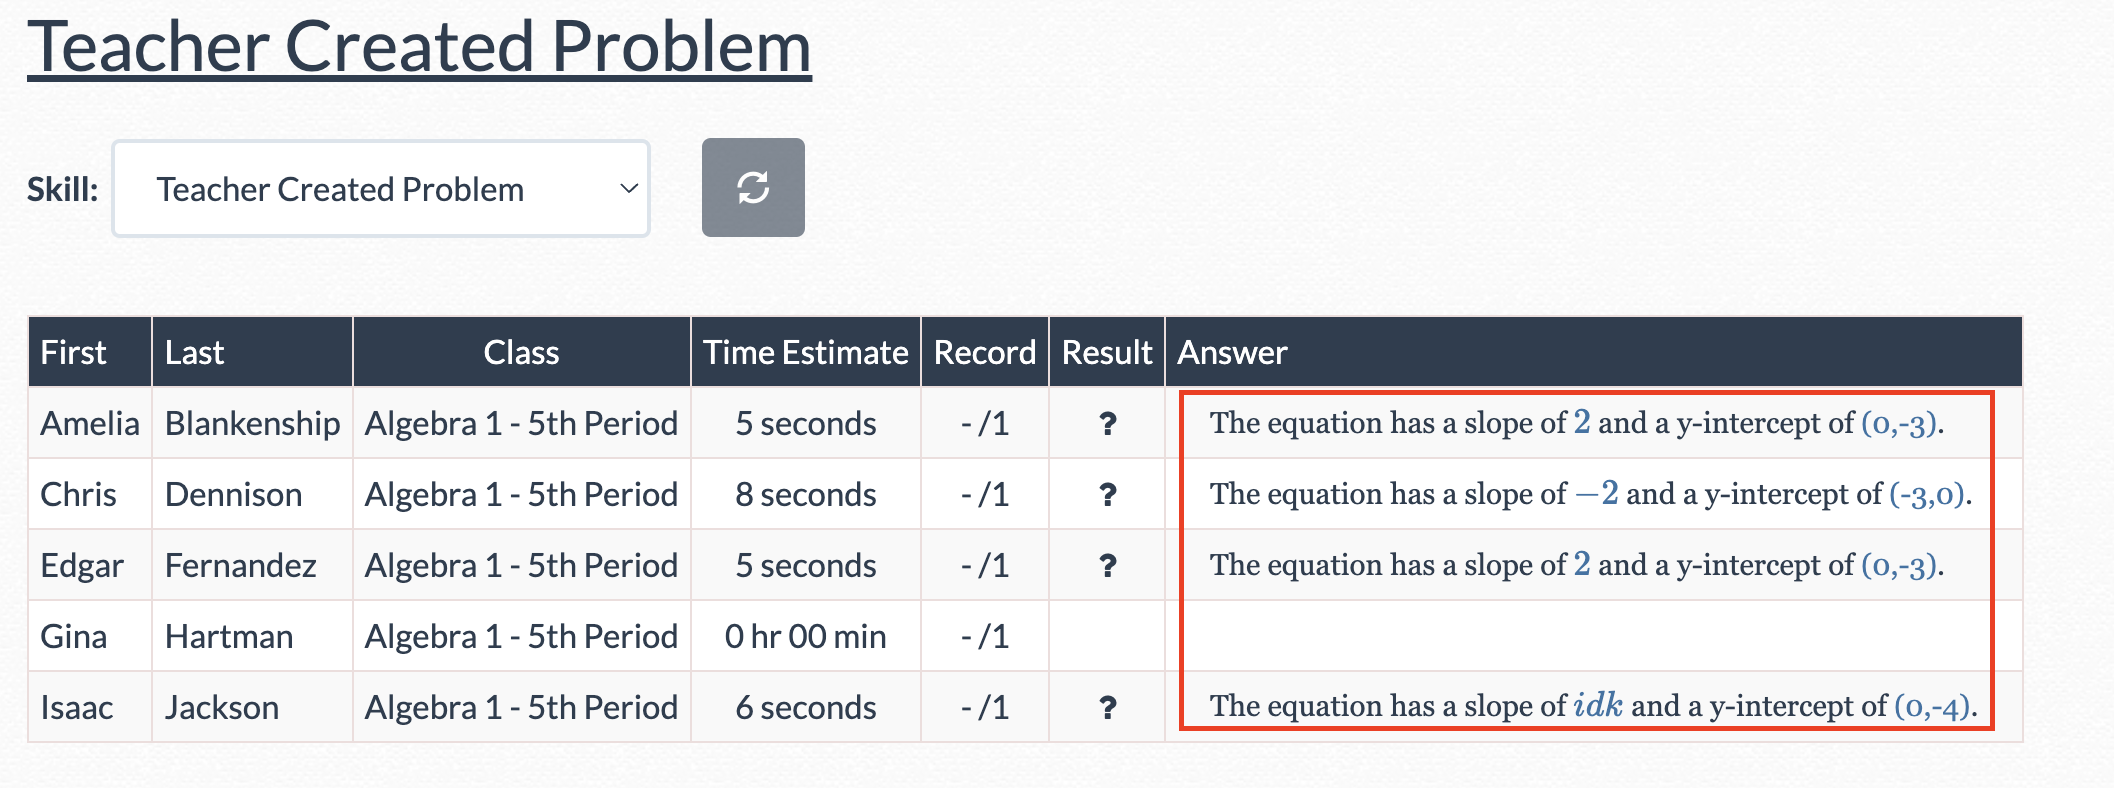 |
| Click on the “Record” column to assign full, partial, or no credit to each student for the question. | 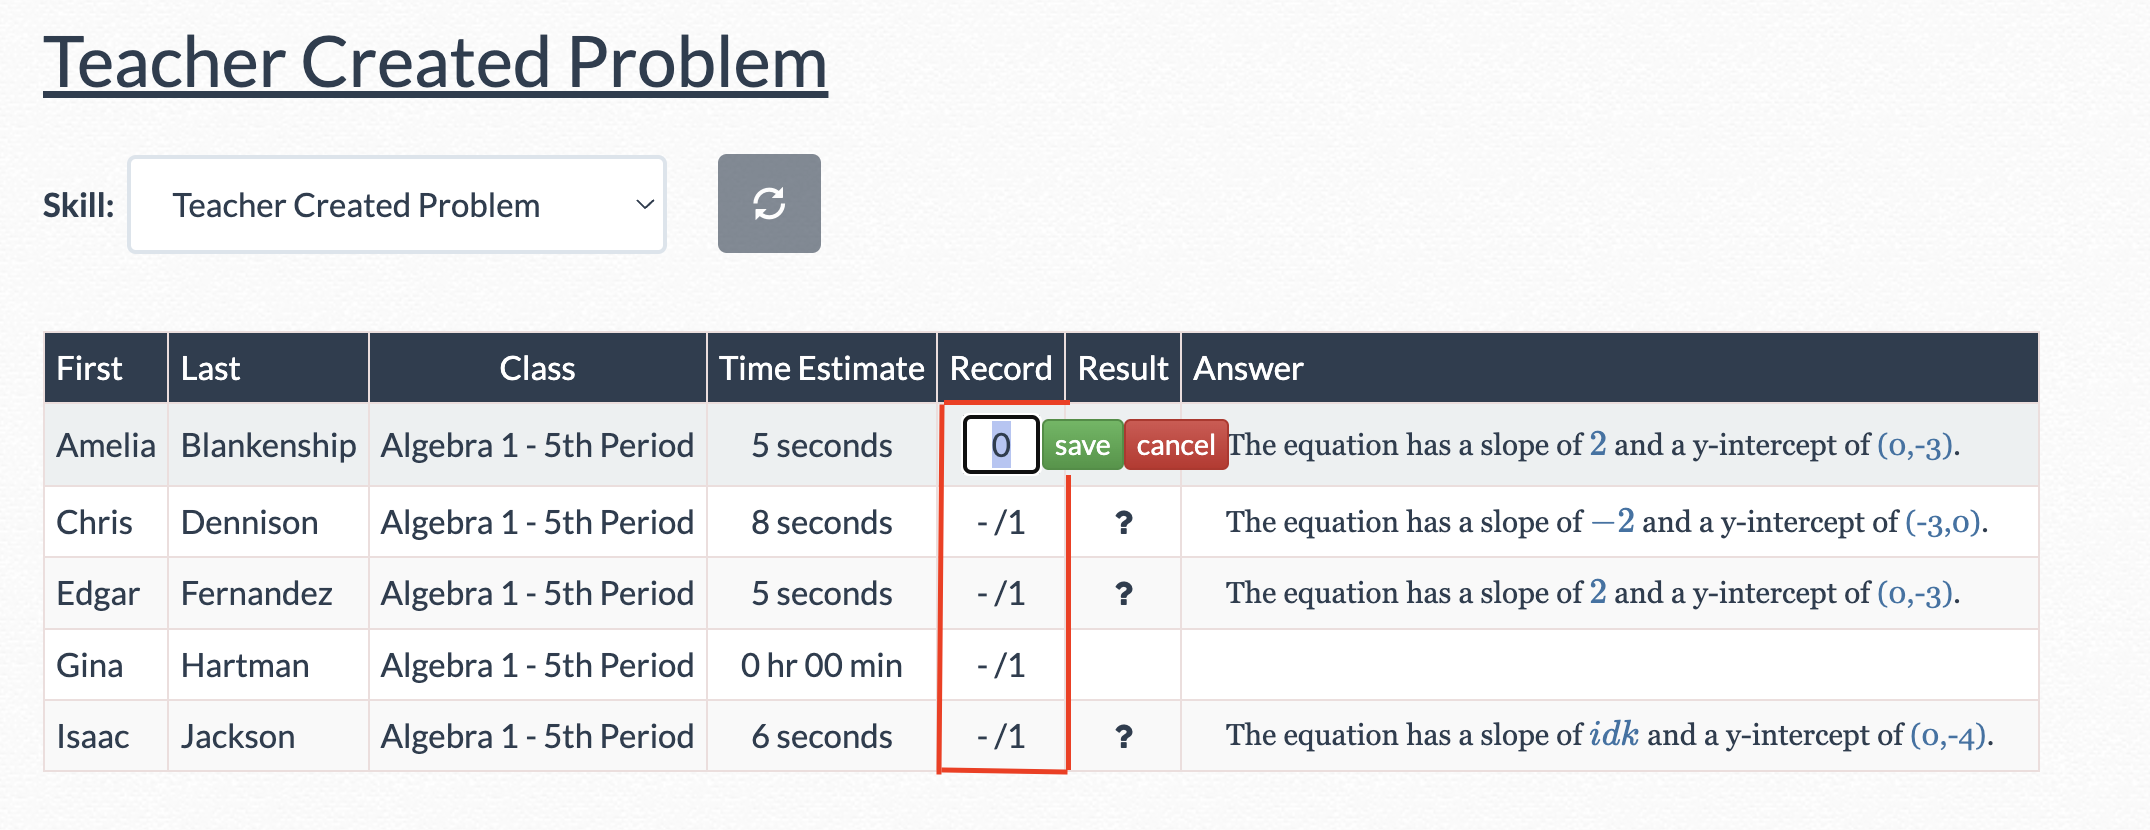 |
| Note: If you update the answer for an auto-graded question after students have begun the assignment, you will need to manually regrade any student who has already answered the question (where appropriate). |
- create
- fill
- fill in the blank
- guided
Was this article helpful?